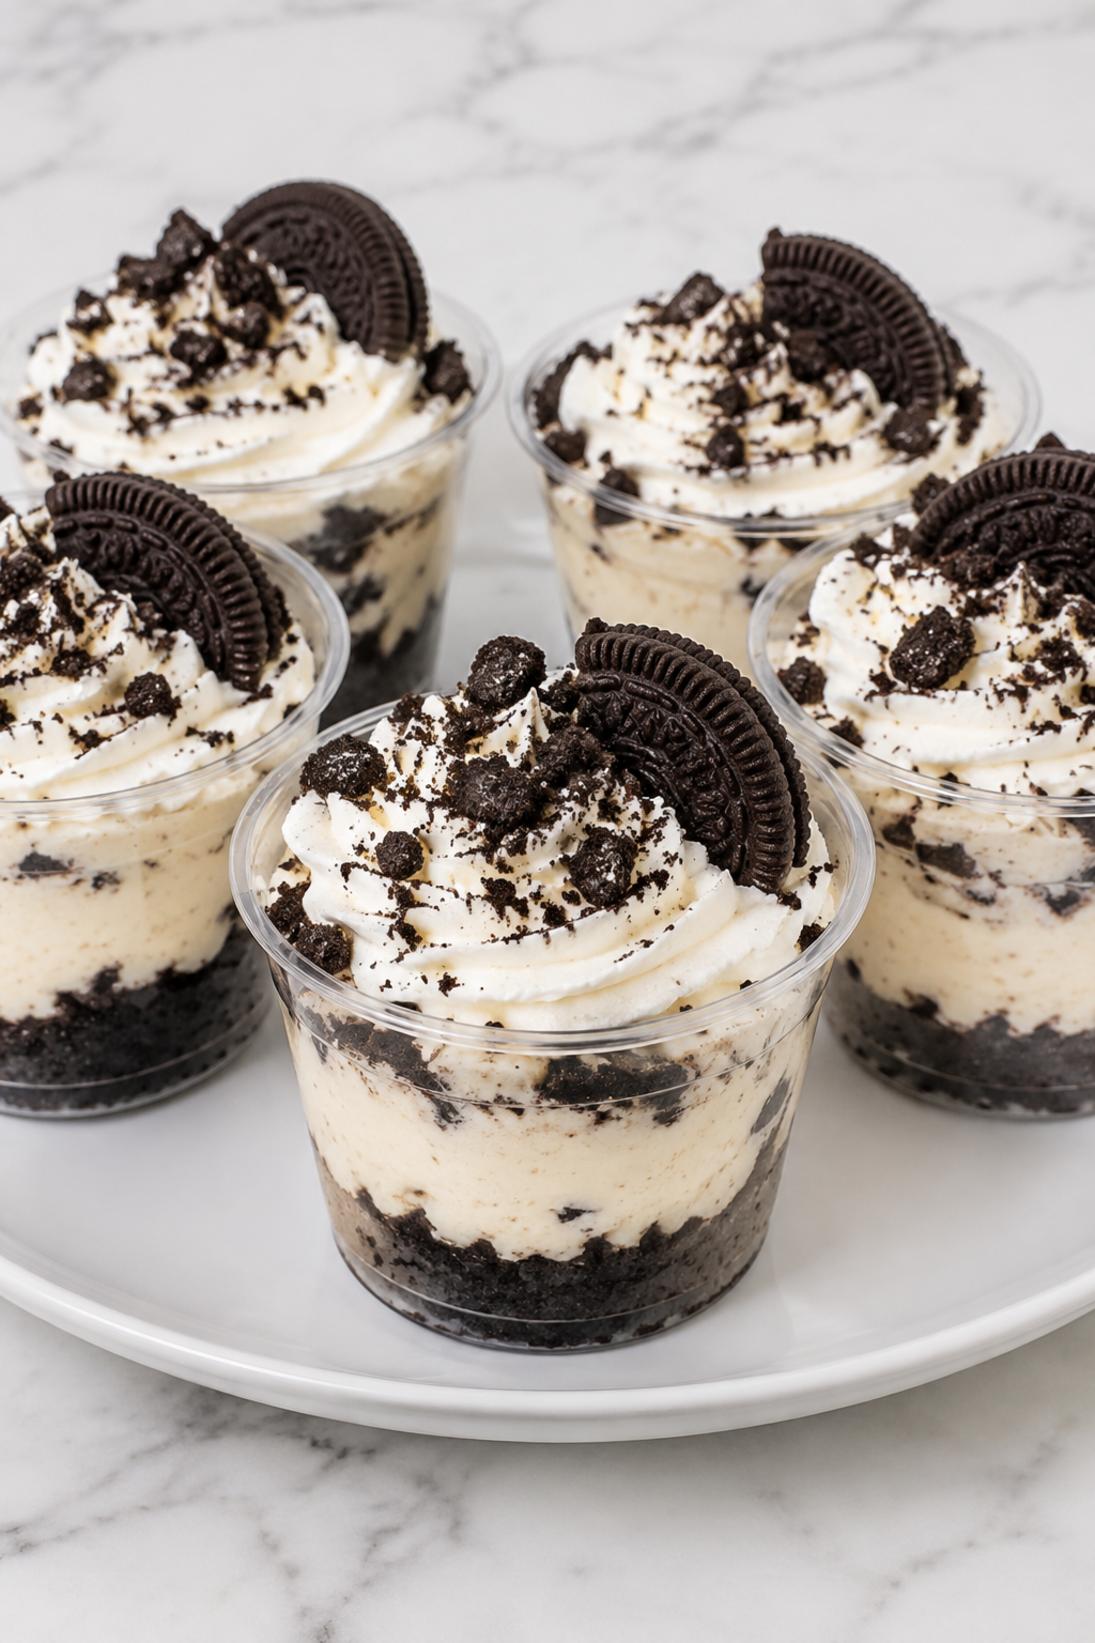
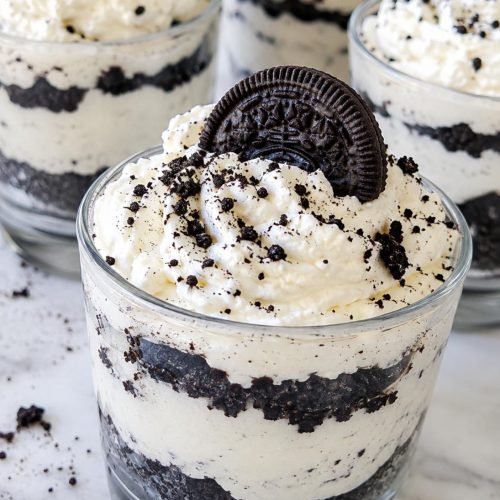
Oreo Cheesecake Dessert Cups are my go-to when I want a no-bake dessert that still feels like a real treat. You get that familiar cookies-and-cream flavor with a buttery Oreo base and a creamy cheesecake layer in cute little cups.
The filling is light and fluffy, not dense, and the Oreos keep it tasting like the classic cookie everyone expects. I like the way the crunchy cookie bits break up the smooth layers so it doesn’t feel one-note.
These are especially good for parties and potlucks because they’re already portioned, easy to chill, and easy to serve. For me, they’re also a nice option when I want dessert in the fridge that’s ready to grab.

Why You’ll Love This Recipe
No-bake ease: No oven, no water bath, no worrying about cracks. Just a simple chill-and-serve dessert.
Individual cups: The layers look nice in clear cups, and it’s way less messy than slicing cheesecake.
Light filling: Folding in whipped cream keeps the cheesecake layer airy and spoonable, not heavy.
Classic Oreo flavor: It tastes like cookies-and-cream in the most straightforward way, which is exactly what I want here.
Make-ahead friendly: These hold up really well in the fridge, so you can get dessert done early and stop thinking about it.
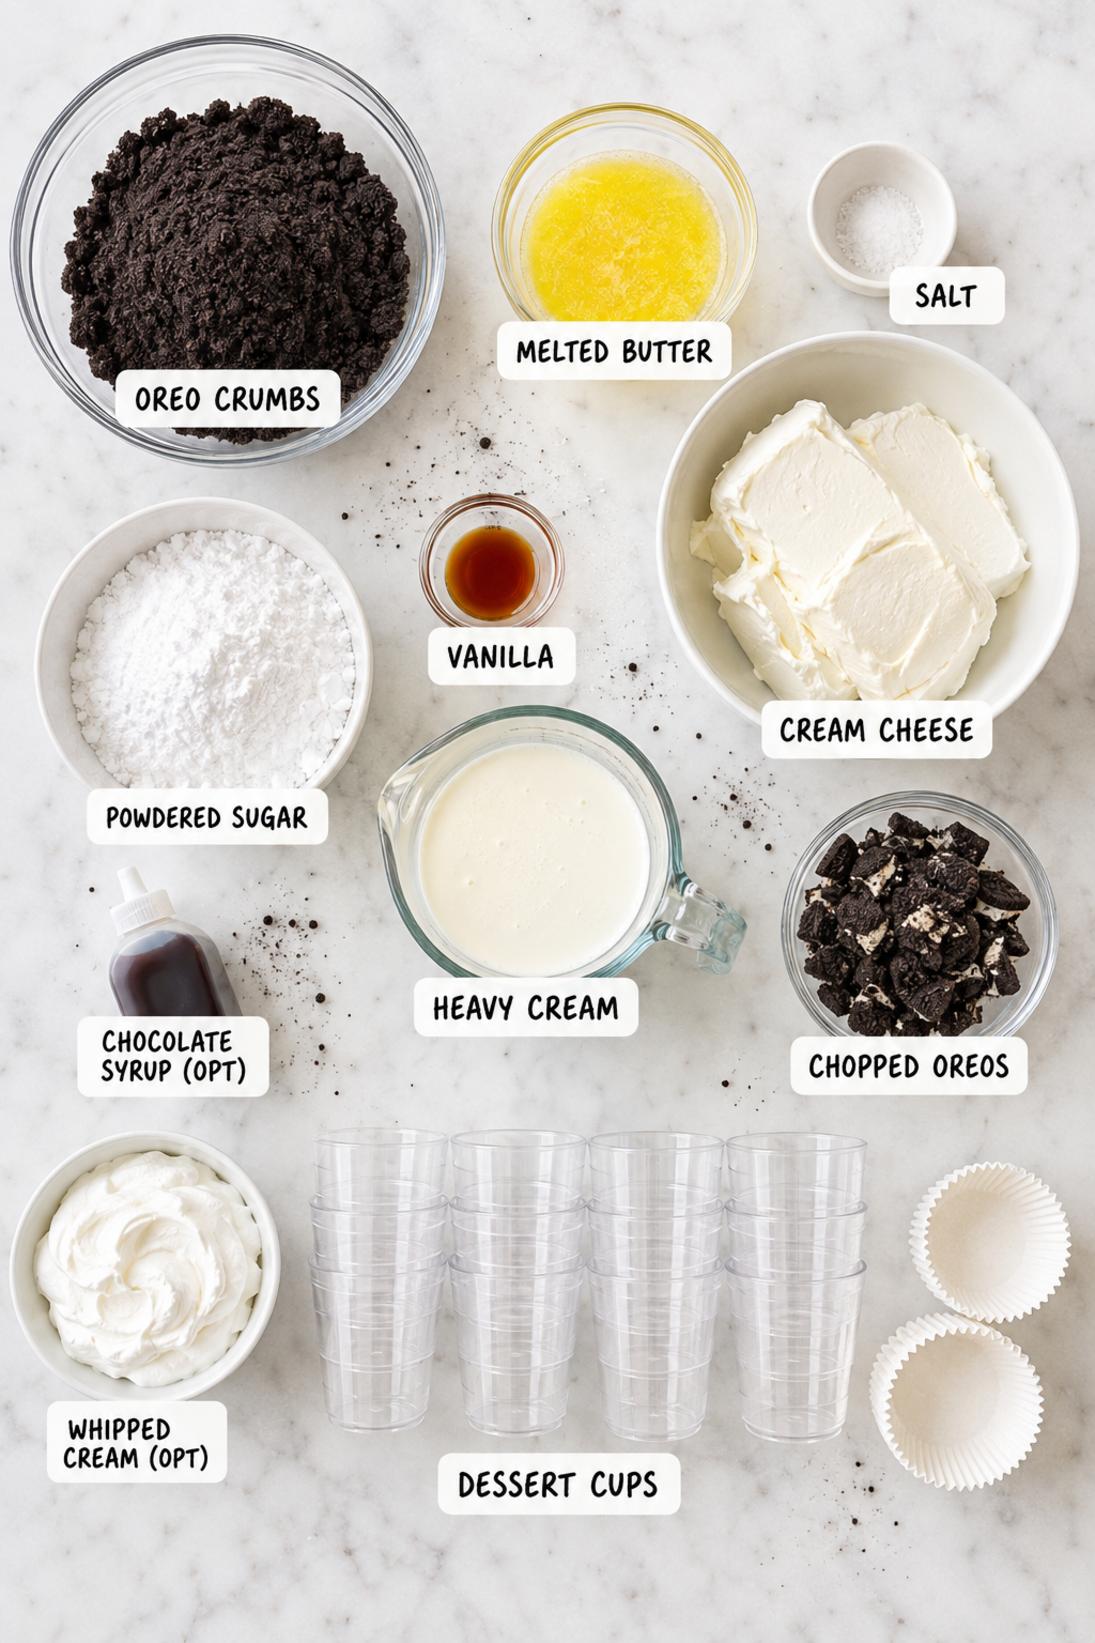
Ingredients You’ll Need
Oreo crumb base
- Oreo cookies: Regular Oreos are what I use, crushed pretty fine so the base presses in nicely. A food processor is easiest, but a zip-top bag and rolling pin work too.
- Unsalted butter: Melted butter is what binds the crumbs so they don’t crumble apart when you dig in with a spoon.
- Salt (optional): I like a tiny pinch, especially if you’re using very sweet toppings. It just keeps the base from tasting flat.
Cheesecake filling
- Cream cheese: Use full-fat cream cheese for the best texture, and make sure it’s softened so you don’t end up with little lumps.
- Powdered sugar: This dissolves smoothly and keeps the filling creamy. Granulated sugar can feel a bit gritty in no-bake fillings.
- Vanilla extract: Just enough to give the filling that “cheesecake” taste instead of plain sweet cream.
- Heavy whipping cream: Cold cream whips up better and gives the filling that lighter mousse-like feel. If it’s warm, it won’t hold peaks as well.
Assembly and topping
- Oreo cookies (chopped): I like rough chunks here so you get a little crunch in the layers and on top.
- Whipped cream (optional): Nice if you want a softer finish on top, especially if you’re serving these at a party.
- Chocolate syrup (optional): A drizzle makes them look finished and adds a little extra chocolate, but it’s not required.
Recipe Instructions
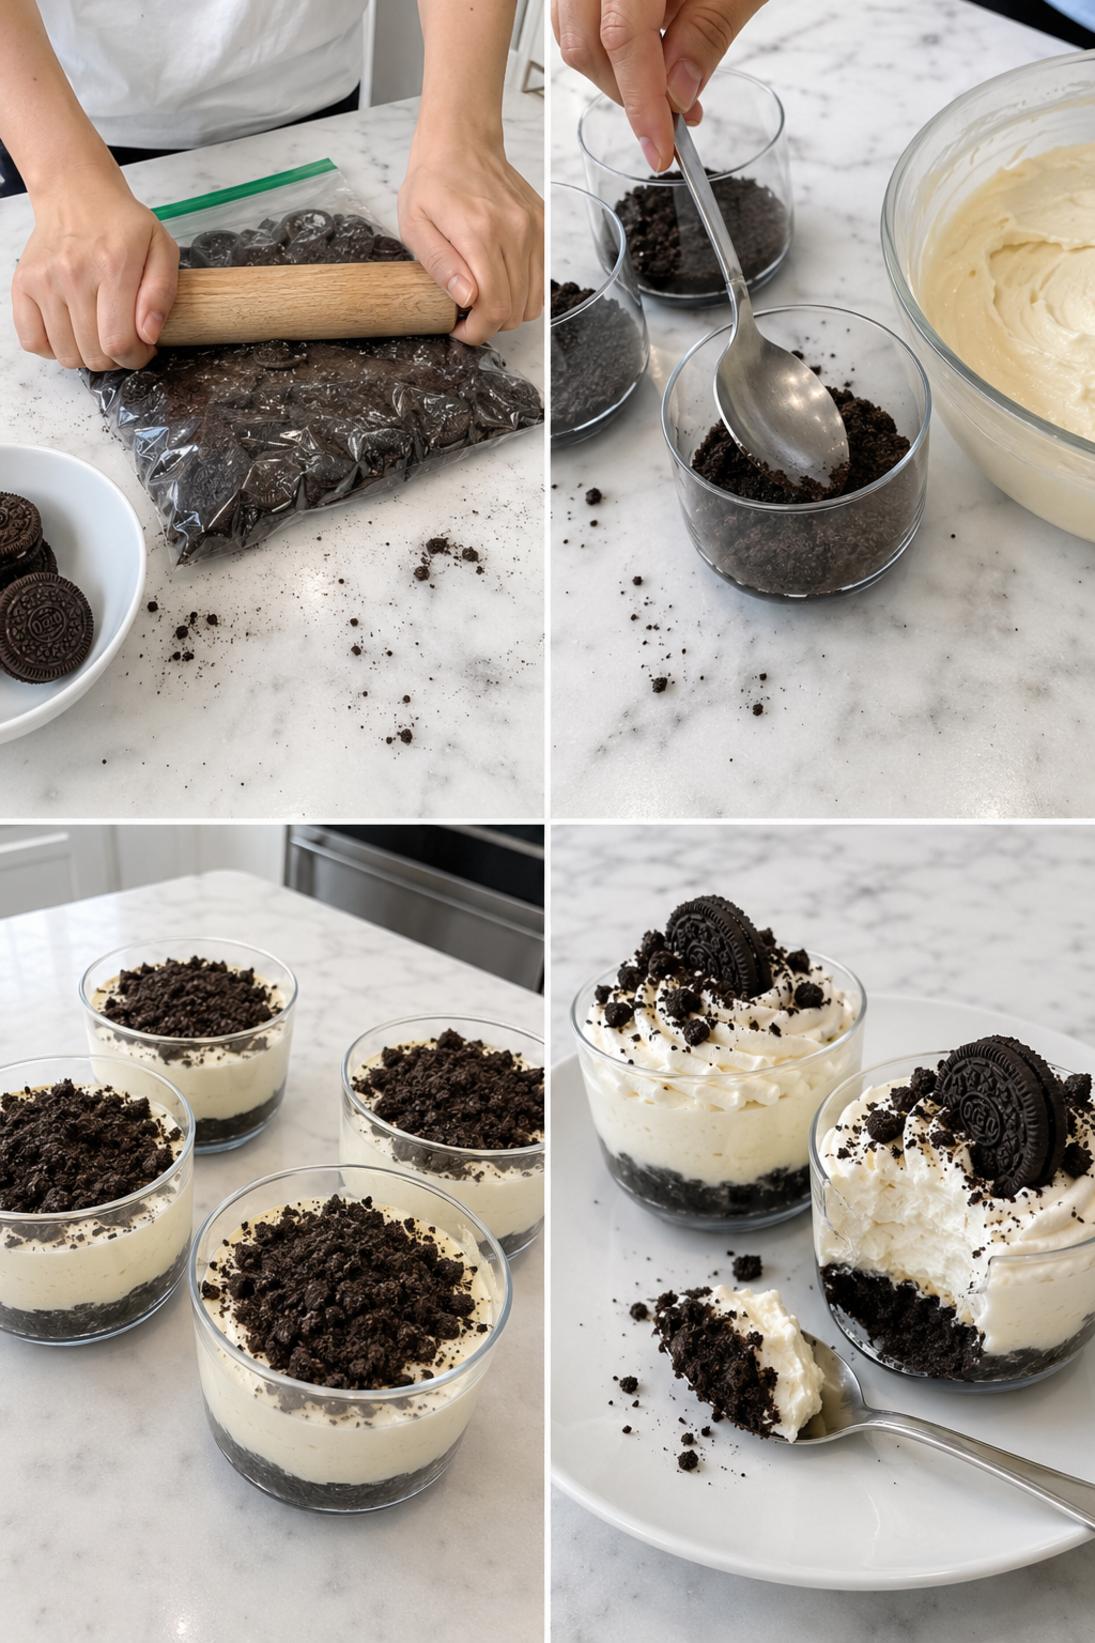
- Crush the cookies: Crush 18 Oreo cookies into fine crumbs. You can use a food processor or put them in a zip-top bag and crush with a rolling pin.
- Mix the crumb base: Stir the crumbs with melted butter and the optional pinch of salt until the mixture looks evenly moistened.
- Press the base: Spoon about 2 tablespoons of the crumb mixture into each of 8 cups, then press lightly to form the base.
- Beat the cream cheese: Beat the softened cream cheese until smooth and creamy, scraping the bowl so there are no lumps.
- Add sugar and vanilla: Add the powdered sugar and vanilla extract, then beat until fully combined and fluffy.
- Whip the cream: In a separate bowl, whip the cold heavy whipping cream to stiff peaks.
- Fold the filling: Fold the whipped cream into the cream cheese mixture until no streaks remain.
- Layer the cups: Pipe or spoon a layer of filling over each crumb base, then sprinkle on a layer of remaining Oreo crumbs or chopped cookies. Repeat with another layer of filling and finish with chopped Oreos on top.
- Chill: Cover and refrigerate at least 2 hours before serving.
Some of my tips!
This is the part that really makes a difference. If you only read one section, make it this one because this is where I share the little trick that helps the recipe turn out so well.
Recipe Tips & Tricks
Start with softened cream cheese. If it’s still cold, it won’t beat smooth and you’ll end up chasing lumps later. I usually let it sit out until it presses easily with a finger.
Whip the cream to stiff peaks. This is what helps the cups hold their shape and look like clean layers. Stop once the peaks stand up straight; over-whipping can make it look a little grainy.
Fold gently, but fully. Use a spatula and fold until you don’t see streaks. If you mix too hard, you’ll knock out some of the fluff.
Use a piping bag if you want neat layers. It’s not required, but it makes the cups look tidy and keeps the sides cleaner. A zip-top bag with the corner snipped works fine.
Give them enough chill time. Two hours is the minimum, but longer makes the layers firmer and easier to scoop. If you want really clean layers, I lean closer to 4 hours.
Make some touches!
There are plenty of easy ways to serve this depending on the occasion. Keep it simple, or add a few small touches to make it feel a little more special.
Serving Suggestions
- Whipped cream: Add a small swirl right before serving. It’s especially nice if the cups have been chilling for a while and you want a softer finish.
- Chocolate syrup: A quick drizzle over the top makes them look a little more “dessert-y.” I keep it light so the cups don’t get too sweet.
- Fresh berries: Strawberries or raspberries are good on the side. The fruit is a nice break from the rich cookies-and-cream flavor.
- Coffee: These are really good with coffee, especially after dinner. I usually serve them with a simple latte or iced coffee.
Save it for later
This section covers how to store leftovers and what parts of the recipe you can prepare ahead of time.
Storage and Make Ahead
Store the cups covered in the fridge for up to 3 days. I like using cups with lids, or you can cover a tray of cups tightly with plastic wrap so they don’t pick up fridge smells.
You can make these ahead the day before and let them chill overnight. The layers set up a bit more, and the flavor is even better the next day.
If you’re adding whipped cream or chocolate syrup, I usually do that right before serving. The cups keep their clean look that way.
A few quick answers
This section covers a few extra details that may help before you head to the recipe card.
Recipe FAQs
Do I have to use homemade whipped cream?
No. You can use about 8 ounces of whipped topping instead, and it makes the whole recipe even faster. The texture is a little more “set,” but it works well in these cups.
How long do these need to chill?
At least 2 hours so the layers firm up. If you have time, 3 to 4 hours gives you the cleanest layers and a more cheesecake-like texture.
Can I make these gluten free?
Yes, just use gluten free sandwich cookies in place of the Oreos. Everything else in the recipe stays the same.
What kind of cups should I use?
Any small dessert cup works. I like clear cups (around 8 ounces) so you can see the layers, but small jars or even wine glasses are fine if that’s what you have.
Can I add extra mix-ins to the filling?
You can, but keep it simple so the filling still sets up. Mini chocolate chips or a few extra crushed cookies folded in at the end are both good options.
You might also like
Before you go, take a look at a few other recipes below the recipe card. They use similar ingredients in a different way and are worth saving too.
MORE DINNER RECIPES TO TRY


Oreo Cheesecake Dessert Cups
INGREDIENTS
Oreo crumb base
- 18 Oreo cookies crushed
- 4 tbsp unsalted butter melted
- 1 pinch salt optional.
Cheesecake filling
- 16 oz cream cheese softened
- 3/4 cup powdered sugar
- 1 tsp vanilla extract
- 1 cup heavy whipping cream cold.
Assembly and topping
- 6 Oreo cookies roughly chopped
- whipped cream optional
- chocolate syrup optional.
INSTRUCTIONS
Oreo crumb base
- Crush 18 Oreo cookies into fine crumbs
- Stir crumbs with melted butter and optional salt until evenly moistened
- Spoon about 2 tbsp crumb mixture into each of 8 cups and press lightly to form the base.
Cheesecake filling
- Beat softened cream cheese until smooth
- Add powdered sugar and vanilla and beat until fully combined and fluffy
- In a separate bowl whip cold heavy cream to stiff peaks
- Fold whipped cream into the cream cheese mixture until no streaks remain.
Assemble and chill
- Pipe or spoon a layer of filling over each crumb base
- Sprinkle a layer of remaining Oreo crumbs or chopped cookies
- Repeat with another layer of filling and finish with chopped Oreos
- Cover and refrigerate at least 2 hours before serving.