
I am absolutely obsessed with Pineapple Upside Down Cake! It is the perfect combination of sweet, juicy pineapple, rich buttery cake, and that irresistibly caramelized topping. The recipe is surprisingly simple, yet it never fails to impress.
First, you start by melting butter and brown sugar in a cake pan, then layering pineapple slices and maraschino cherries on top. Next comes the cake batter, which is poured over the fruit and baked until golden and fragrant. And the best part? When you flip it over, the gorgeous caramelized pineapple goodness is revealed on top. It’s a classic dessert that never disappoints and always leaves me craving more!
Ingredients Needed for This Recipe
Topping
- 1/4 cup (60g) unsalted butter, melted
- 1/2 cup (100g) packed light or dark brown sugar
- 8–10 pineapple slices
- 15–20 maraschino cherries
Cake
- 1 and 1/2 cups (177g) cake flour (spooned & leveled)
- 1 teaspoon baking powder
- 1/4 teaspoon baking soda
- 1/2 teaspoon salt
- 6 Tablespoons (85g) unsalted butter, softened to room temperature
- 3/4 cup (150g) granulated sugar
- 2 large egg whites, at room temperature
- 1/3 cup (80g) sour cream, at room temperature
- 1 teaspoon pure vanilla extract
- 1/4 cup (60ml) pineapple juice, at room temperature (use leftover from can)
- 2 Tablespoons (30ml) milk, at room temperature
instructions for Making Pineapple Upside Down Cak
- Preheat oven to 350°F (177°C).
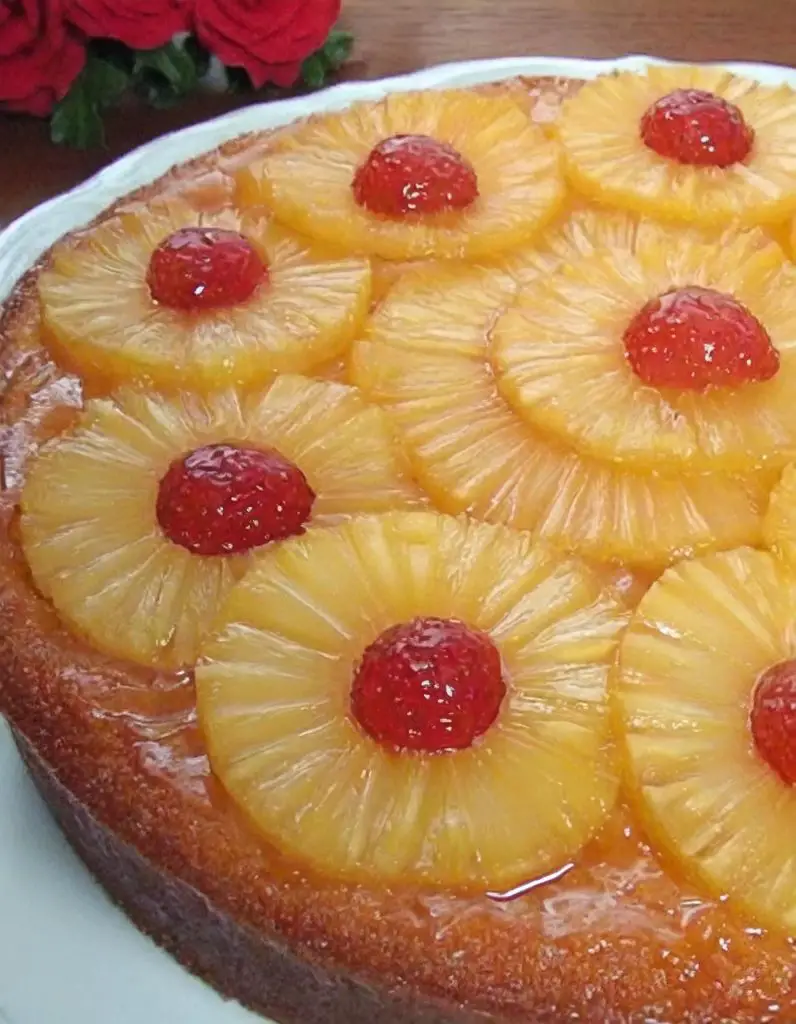
- To prepare the topping, start by pouring 1/4 cup of melted butter into a 9×2 inch pie dish or round cake pan that is 2 inches deep (I suggest using a pie dish that is 1.8 inches deep to prevent any overflowing issues). Evenly sprinkle brown sugar over the butter. Use a clean towel or paper towel to remove any excess liquid from the fruit, as having wet fruit increases the risk of the cake overflowing or the topping seeping over the sides when inverted. Arrange about 6-7 blotted pineapple slices and all the cherries on top of the brown sugar. I like to cut 3 pineapple rings in half and place them around the sides of the pan as well. Take a look at my photo and video above to see how the topping should be arranged. Place the pan in the refrigerator for a few minutes while you prepare the cake batter. This will help the topping’s arrangement solidify or “set”.
- Prepare the batter for the cake by combining the cake flour, baking powder, baking soda, and salt using a whisk. Keep this mixture aside for later.
- Using a handheld or stand mixer with a paddle or whisk attachment, beat the butter on high speed until it becomes smooth and creamy, which should take around 1 minute. After that, add the sugar and continue beating on high speed until both ingredients are well mixed together, which should also take around 1 minute. Remember to scrape down the sides and bottom of the bowl with a rubber spatula as needed. Next, beat in the egg whites until they are combined, then add the sour cream and vanilla extract, continuing to beat at high speed. Once again, scrape down the bowl as necessary. Now, pour the dry ingredients into the mixture of wet ingredients. Set the mixer to low speed and, while it runs, gradually pour in the pineapple juice and milk. Beat at low speed just until all the ingredients are mixed, being careful not to overdo it. It may be necessary to whisk the batter by hand to ensure there are no lumps at the bottom of the bowl. The batter should have a slightly thick consistency.
- Take the topping out of the fridge and then pour the cake batter evenly over it.
- To ensure even baking, cover the cake with foil halfway through and bake for 43-48 minutes. Check for doneness by inserting a toothpick in the center; it should come out mostly clean with a few moist crumbs. Don’t worry if the cake takes longer to bake or if it sticks to the foil; we serve it upside down regardless.
- Take the cake out of the oven and let it cool on a wire rack for only 20 minutes. Turn the cake, which is slightly cooled, onto a cake stand or serving plate. A few of the juices from the topping may leak out, and that’s alright. You can cut and serve the cake while it’s still warm, but the pieces will be untidy. I recommend letting the cake cool completely at room temperature before slicing and serving. Don’t put the cake in the refrigerator to speed up the cooling, as it might make the cake too dense.
- You can keep any remaining slices of cake in the fridge for up to 3 days or in the freezer for 3 months. To defrost, simply leave at room temperature. However, I advise against freezing the entire cake because the topping may not defrost well. For instructions on preparing the cake in advance, please see below.
Tips for Perfecting the Recipe
Understand Your Ingredients: The key to a perfect Pineapple Upside Down Cake lies in understanding your ingredients. Cake flour, for instance, yields a softer crumb than all-purpose flour due to its lower protein content. Using room-temperature ingredients ensures that the batter mixes evenly, preventing overmixing which can lead to a dense cake.
Creaming Butter and Sugar: This step is crucial for incorporating air into the batter, which helps to achieve a light and fluffy texture. Make sure the butter is at room temperature for the best results. Creaming the butter and sugar until the mixture is light and fluffy, usually about 3-5 minutes, sets the foundation for a well-risen cake.
Egg Whites: Using egg whites instead of whole eggs prevents the cake from becoming too dense. The egg whites should be at room temperature to achieve maximum volume when beaten. This contributes to the overall lightness of the cake’s texture.
Preventing a Soggy Bottom: The fruit topping, while delicious, can make the bottom of the cake soggy if not handled correctly. Blotting the pineapple and cherries to remove excess juice is a simple yet effective step to prevent this. Additionally, ensuring the brown sugar and butter mixture is spread evenly helps create a barrier that protects the cake from getting too wet.
Baking Time and Temperature: Oven temperatures can vary, so it’s important to know your oven. The cake should be baked just until a toothpick comes out clean or with a few moist crumbs. Overbaking can dry out the cake, while underbaking can leave it too moist or even uncooked in the center.
Serving Suggestions
Warm vs. Cool: This cake can be served warm or at room temperature. Serving it warm enhances the flavors and makes the cake even more comforting, especially with a scoop of vanilla ice cream on the side. If serving at room temperature, allow the cake to cool completely to make slicing easier and to let the flavors meld together.
Accompaniments: While delicious on its own, Pineapple Upside Down Cake pairs wonderfully with a dollop of whipped cream or a scoop of vanilla ice cream. The creaminess complements the caramelized topping and adds a luxurious texture contrast.
Presentation: Inverting the cake onto a serving plate not only reveals its beautiful topping but also makes for an impressive presentation. Garnish with additional maraschino cherries or a sprinkle of toasted coconut flakes for an extra touch of elegance.
Storage Tips
Room Temperature Storage: If you plan to consume the cake within a day or two, storing it at room temperature under a cake dome or an inverted bowl is sufficient. This keeps the cake moist without altering the texture of the topping.
Refrigerating the Cake: For longer storage, refrigerate the cake covered tightly with plastic wrap or in an airtight container. This can extend its life for up to 3 days. However, be aware that refrigeration can slightly alter the texture, making the cake denser.
Freezing for Long-Term Storage: Pineapple Upside Down Cake can be frozen for up to 3 months. Wrap individual slices or the entire cake securely in plastic wrap and then aluminum foil. Thaw at room temperature before serving. Note that freezing may affect the texture of the fruit topping.
Frequently Asked Questions
Can I use fresh pineapple instead of canned? Yes, fresh pineapple can be used in place of canned. Ensure it’s thinly sliced and blotted to remove excess moisture. Keep in mind that fresh pineapple may be less sweet and more acidic than canned, affecting the final taste.
What if my cake is too dense? A dense cake can result from overmixing the batter, using cold ingredients, or not creaming the butter and sugar sufficiently. Ensure ingredients are at room temperature and mix just until combined.
Can I make this cake gluten-free? Yes, you can substitute the cake flour for a gluten-free flour blend designed for baking. Keep in mind that textures and flavors might slightly differ, so it’s worth experimenting with different blends to find one that works well.
Why did my cake stick to the pan? To prevent sticking, ensure the pan is not greased before adding the butter and brown sugar topping. This allows the caramelized sugar to create a non-stick barrier. If the cake still sticks, run a knife around the edges before inverting and make sure the cake has cooled for the recommended time.
Can I add nuts to the topping? Absolutely! Adding chopped pecans or walnuts to the brown sugar and butter mixture before arranging the pineapple and cherries can add a delightful crunch and nutty flavor to the cake.

Pineapple Upside Down Cake
INGREDIENTS
Topping
- 1/4 cup 60g unsalted butter, melted
- 1/2 cup 100g packed light or dark brown sugar
- 8 –10 pineapple slices
- 15 –20 maraschino cherries
Cake
- 1 and 1/2 cups 177g cake flour (spooned & leveled)
- 1 teaspoon baking powder
- 1/4 teaspoon baking soda
- 1/2 teaspoon salt
- 6 Tablespoons 85g unsalted butter, softened to room temperature
- 3/4 cup 150g granulated sugar
- 2 large egg whites at room temperature
- 1/3 cup 80g sour cream, at room temperature
- 1 teaspoon pure vanilla extract
- 1/4 cup 60ml pineapple juice, at room temperature (use leftover from can)
- 2 Tablespoons 30ml milk, at room temperature
INSTRUCTIONS
- Preheat oven to 350°F (177°C).
- To prepare the topping, start by pouring 1/4 cup of melted butter into a 9×2 inch pie dish or round cake pan that is 2 inches deep (I suggest using a pie dish that is 1.8 inches deep to prevent any overflowing issues). Evenly sprinkle brown sugar over the butter. Use a clean towel or paper towel to remove any excess liquid from the fruit, as having wet fruit increases the risk of the cake overflowing or the topping seeping over the sides when inverted. Arrange about 6-7 blotted pineapple slices and all the cherries on top of the brown sugar. I like to cut 3 pineapple rings in half and place them around the sides of the pan as well. Take a look at my photo and video above to see how the topping should be arranged. Place the pan in the refrigerator for a few minutes while you prepare the cake batter. This will help the topping’s arrangement solidify or “set”.
- Prepare the batter for the cake by combining the cake flour, baking powder, baking soda, and salt using a whisk. Keep this mixture aside for later.
- Using a handheld or stand mixer with a paddle or whisk attachment, beat the butter on high speed until it becomes smooth and creamy, which should take around 1 minute. After that, add the sugar and continue beating on high speed until both ingredients are well mixed together, which should also take around 1 minute. Remember to scrape down the sides and bottom of the bowl with a rubber spatula as needed. Next, beat in the egg whites until they are combined, then add the sour cream and vanilla extract, continuing to beat at high speed. Once again, scrape down the bowl as necessary. Now, pour the dry ingredients into the mixture of wet ingredients. Set the mixer to low speed and, while it runs, gradually pour in the pineapple juice and milk. Beat at low speed just until all the ingredients are mixed, being careful not to overdo it. It may be necessary to whisk the batter by hand to ensure there are no lumps at the bottom of the bowl. The batter should have a slightly thick consistency.
- Take the topping out of the fridge and then pour the cake batter evenly over it.
- To ensure even baking, cover the cake with foil halfway through and bake for 43-48 minutes. Check for doneness by inserting a toothpick in the center; it should come out mostly clean with a few moist crumbs. Don’t worry if the cake takes longer to bake or if it sticks to the foil; we serve it upside down regardless.
- Take the cake out of the oven and let it cool on a wire rack for only 20 minutes. Turn the cake, which is slightly cooled, onto a cake stand or serving plate. A few of the juices from the topping may leak out, and that’s alright. You can cut and serve the cake while it’s still warm, but the pieces will be untidy. I recommend letting the cake cool completely at room temperature before slicing and serving. Don’t put the cake in the refrigerator to speed up the cooling, as it might make the cake too dense.
- You can keep any remaining slices of cake in the fridge for up to 3 days or in the freezer for 3 months. To defrost, simply leave at room temperature. However, I advise against freezing the entire cake because the topping may not defrost well. For instructions on preparing the cake in advance, please see below.


