
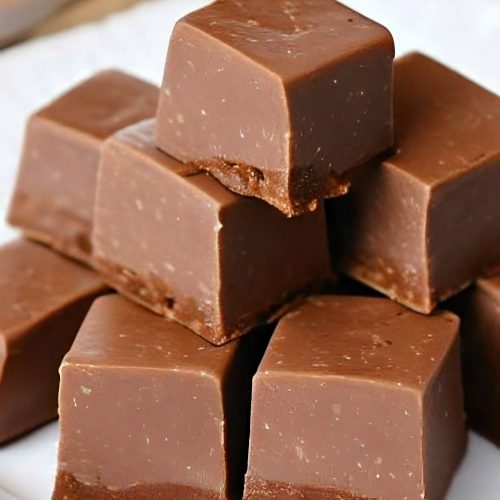
This simple yet delicious Chocolate Fudge requires only a few ingredients and minimal effort. To make it, all you need is some chocolate chips, condensed milk, butter, and a pinch of salt.

Simply melt the chocolate and butter together, stir in the condensed milk and salt, and let it cool and set. The result? A rich and creamy fudge that melts in your mouth with every delectable bite. Trust me, once you try this easy chocolate fudge recipe, you’ll be hooked!
Ingredients Needed for This Recipe
- 3 cups chocolate chips either semi-sweet or milk chocolate (18.6 ounces) see note 1
- 14 ounces sweetened condensed milk (see note 2)
- 1 teaspoon vanilla extract
Instructions for Making This Chocolate Fudge
- Cover the baking dish with either aluminum foil or two overlapping pieces of parchment paper arranged in the shape of an X.
- Combine the chocolate chips and sweetened condensed milk in a medium saucepan.
- Put the pan on the stovetop over medium low heat. Continuously stir the chocolate until it begins to melt. Incorporate the vanilla extract while continuing to stir.
- Keep stirring until the chocolate has completely melted and the mixture has a smooth consistency and begins to shine.
- Put the mixture into the pan that has been prepared. It will have a thick consistency – if it is difficult to pour due to its thickness, don’t worry, you are still doing it correctly. After pouring all of it into the pan, you can shake the pan gently from side to side to help it settle. Alternatively, you can use a rubber spatula to spread it evenly.
- Let the fudge fully harden by leaving it on the kitchen counter, which will typically take approximately four hours.
- Take out the fudge from the pan and remove the aluminum foil. Trim off the curved edges of the pan. Divide the fudge in half both horizontally and vertically, creating four equally sized squares. Further divide each small square into nine equal pieces by cutting it into three equal parts vertically and horizontally. As a result, you will have 36 equal pieces of fudge.
- You can either enjoy immediately or keep it in a sealed container for a maximum of two weeks. (Refer to the post for freezing instructions.)
Tips for Perfecting the Recipe
Understand Your Ingredients: The quality of your ingredients directly affects the outcome of your fudge. High-quality chocolate chips and pure vanilla extract make a significant difference in flavor. When it comes to sweetened condensed milk, brand quality can impact the texture and sweetness of your fudge. Experiment with different brands to find your preference.
Consistent Low Heat: Melting chocolate with sweetened condensed milk requires patience and a gentle touch. Use low heat to avoid scorching the chocolate, which can create a grainy texture in your fudge. A consistent low heat allows the chocolate to melt evenly, ensuring a smooth and creamy texture.
Stirring Technique: The key to smooth fudge is constant, gentle stirring. This technique prevents the chocolate from sticking to the bottom of the pan and burning. Once the chocolate begins to melt, stir in the vanilla extract to incorporate it thoroughly into the mixture.
Prep Your Pan: Lining your pan with aluminum foil or parchment paper is not just for easy removal, but it also helps in achieving clean cuts. Make sure the lining extends over the edges of the pan to lift the fudge out easily once it’s set.
Cutting Perfect Pieces: For evenly sized pieces of fudge, allow the fudge to set completely before cutting. Use a sharp knife and clean it between cuts to ensure smooth edges. If the fudge is too hard to cut, dipping the knife in hot water can make the process easier.
Serving Suggestions
Classic Platter: Serve your fudge on a simple platter or a decorative plate for a classic presentation. Arrange the pieces neatly in rows or in a circular pattern for an appealing display.
With Coffee or Tea: Fudge pairs wonderfully with hot beverages. Serve it alongside coffee or tea as a sweet treat for your guests. The richness of the fudge complements the bitterness of coffee and the subtlety of tea.
As a Gift: Fudge makes an excellent gift for holidays, birthdays, or any special occasion. Wrap it in cellophane and tie it with a ribbon, or place it in a decorative box for a thoughtful and homemade present.
Dessert Charcuterie Boards: Add fudge to a dessert charcuterie board along with an assortment of cookies, fruits, and nuts. This allows guests to sample a variety of sweets and creates a visually stunning centerpiece.
Storage Tips
Room Temperature Storage: Store fudge in an airtight container at room temperature for up to two weeks. This helps maintain its texture and flavor. Avoid exposing it to direct sunlight or heat sources, which can cause it to melt.
Refrigerating Fudge: While fudge doesn’t need to be refrigerated, doing so can extend its shelf life. If you choose to refrigerate your fudge, wrap it tightly in plastic wrap or aluminum foil to prevent it from absorbing odors from other foods.
Freezing for Longevity: For long-term storage, fudge can be frozen for up to three months. Wrap it securely in plastic wrap and then place it in a freezer bag. Thaw at room temperature for a few hours before serving.
Layering for Storage: If you need to stack your fudge in a container, place a sheet of parchment paper between each layer. This prevents the pieces from sticking together and makes it easier to remove individual pieces.
Frequently Asked Questions
Can I use evaporated milk instead of sweetened condensed milk? No, evaporated milk cannot be substituted for sweetened condensed milk in fudge recipes. Sweetened condensed milk has sugar added, which is crucial for the texture and sweetness of the fudge.
Why is my fudge grainy? Graininess can occur if the chocolate scorches or if sugar crystals form during the cooling process. To prevent this, melt the chocolate slowly on low heat and avoid stirring the fudge once it begins to set.
Can I add nuts or other mix-ins? Absolutely! Stir in about 1/2 cup of your favorite chopped nuts, dried fruit, or even mini marshmallows after the chocolate has melted but before pouring it into the pan. Ensure the add-ins are evenly distributed throughout the mixture.
How do I make vegan fudge? To make vegan fudge, replace the sweetened condensed milk with a vegan alternative, such as sweetened condensed coconut milk, and use vegan chocolate chips. Adjust the quantity slightly if the consistency of the vegan condensed milk differs from the traditional kind.
My fudge didn’t set. What can I do? If your fudge hasn’t set, it might not have been cooked long enough, or there might have been an issue with the proportions of ingredients. You can try refrigerating it to see if it sets. If it remains too soft to cut, consider using it as a sauce over ice cream or repurpose it into truffles by rolling the mixture into balls and coating them with cocoa powder or nuts.
Easy Chocolate Fudge
INGREDIENTS
- 3 cups chocolate chips either semi-sweet or milk chocolate 18.6 ounces see note 1
- 14 ounces sweetened condensed milk see note 2
- 1 teaspoon vanilla extract
INSTRUCTIONS
- Cover the baking dish with either aluminum foil or two overlapping pieces of parchment paper arranged in the shape of an X.
- Combine the chocolate chips and sweetened condensed milk in a medium saucepan.
- Put the pan on the stovetop over medium low heat. Continuously stir the chocolate until it begins to melt. Incorporate the vanilla extract while continuing to stir.
- Keep stirring until the chocolate has completely melted and the mixture has a smooth consistency and begins to shine.
- Put the mixture into the pan that has been prepared. It will have a thick consistency – if it is difficult to pour due to its thickness, don’t worry, you are still doing it correctly. After pouring all of it into the pan, you can shake the pan gently from side to side to help it settle. Alternatively, you can use a rubber spatula to spread it evenly.
- Let the fudge fully harden by leaving it on the kitchen counter, which will typically take approximately four hours.
- Take out the fudge from the pan and remove the aluminum foil. Trim off the curved edges of the pan. Divide the fudge in half both horizontally and vertically, creating four equally sized squares. Further divide each small square into nine equal pieces by cutting it into three equal parts vertically and horizontally. As a result, you will have 36 equal pieces of fudge.
- You can either enjoy immediately or keep it in a sealed container for a maximum of two weeks. (Refer to the post for freezing instructions.)


