

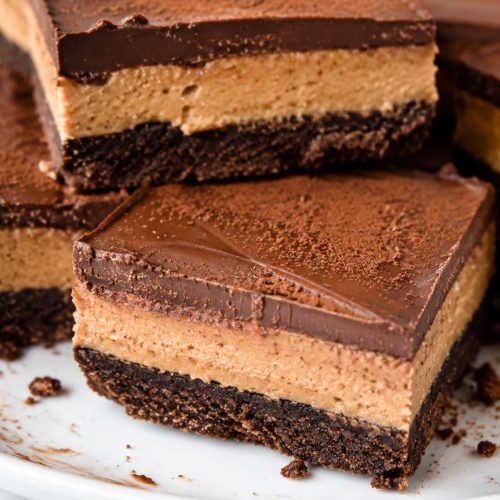
No-Bake Chocolate Bars are the kind of dessert I keep coming back to when I want something rich and chocolatey but not fussy. They’re layered, thick, and a little nostalgic in the best way.
My favorite part is the peanut butter graham crust because it’s sweet, salty, and holds together well once chilled. Then you get that smooth chocolate topping that sets up like a soft snap when it’s cold.
I like these for weekends and holidays, especially when I need a make-ahead dessert for a cookie tray or a casual get-together. They slice into neat little squares, and they’re easy to stash in the fridge until you need them.

Why You’ll Love This Recipe
Fast and Easy: It’s a quick mix-and-chill dessert, and the only “cooking” is melting chocolate for the topping.
Thick, Rich Layers: The crust is dense and peanut buttery, and the chocolate layer on top sets up smooth and fudgy.
Great for Slicing: Once it’s fully chilled, these cut into clean little bars that look nice on a platter.
Make-Ahead Friendly: I like recipes like this because you can make them earlier in the day (or the day before) and forget about them until serving.
Easy to Tweak: You can swap the nut butter, add crunch to the crust, or change the chocolate based on what you keep in the pantry.
Ingredients You’ll Need
Peanut butter crust
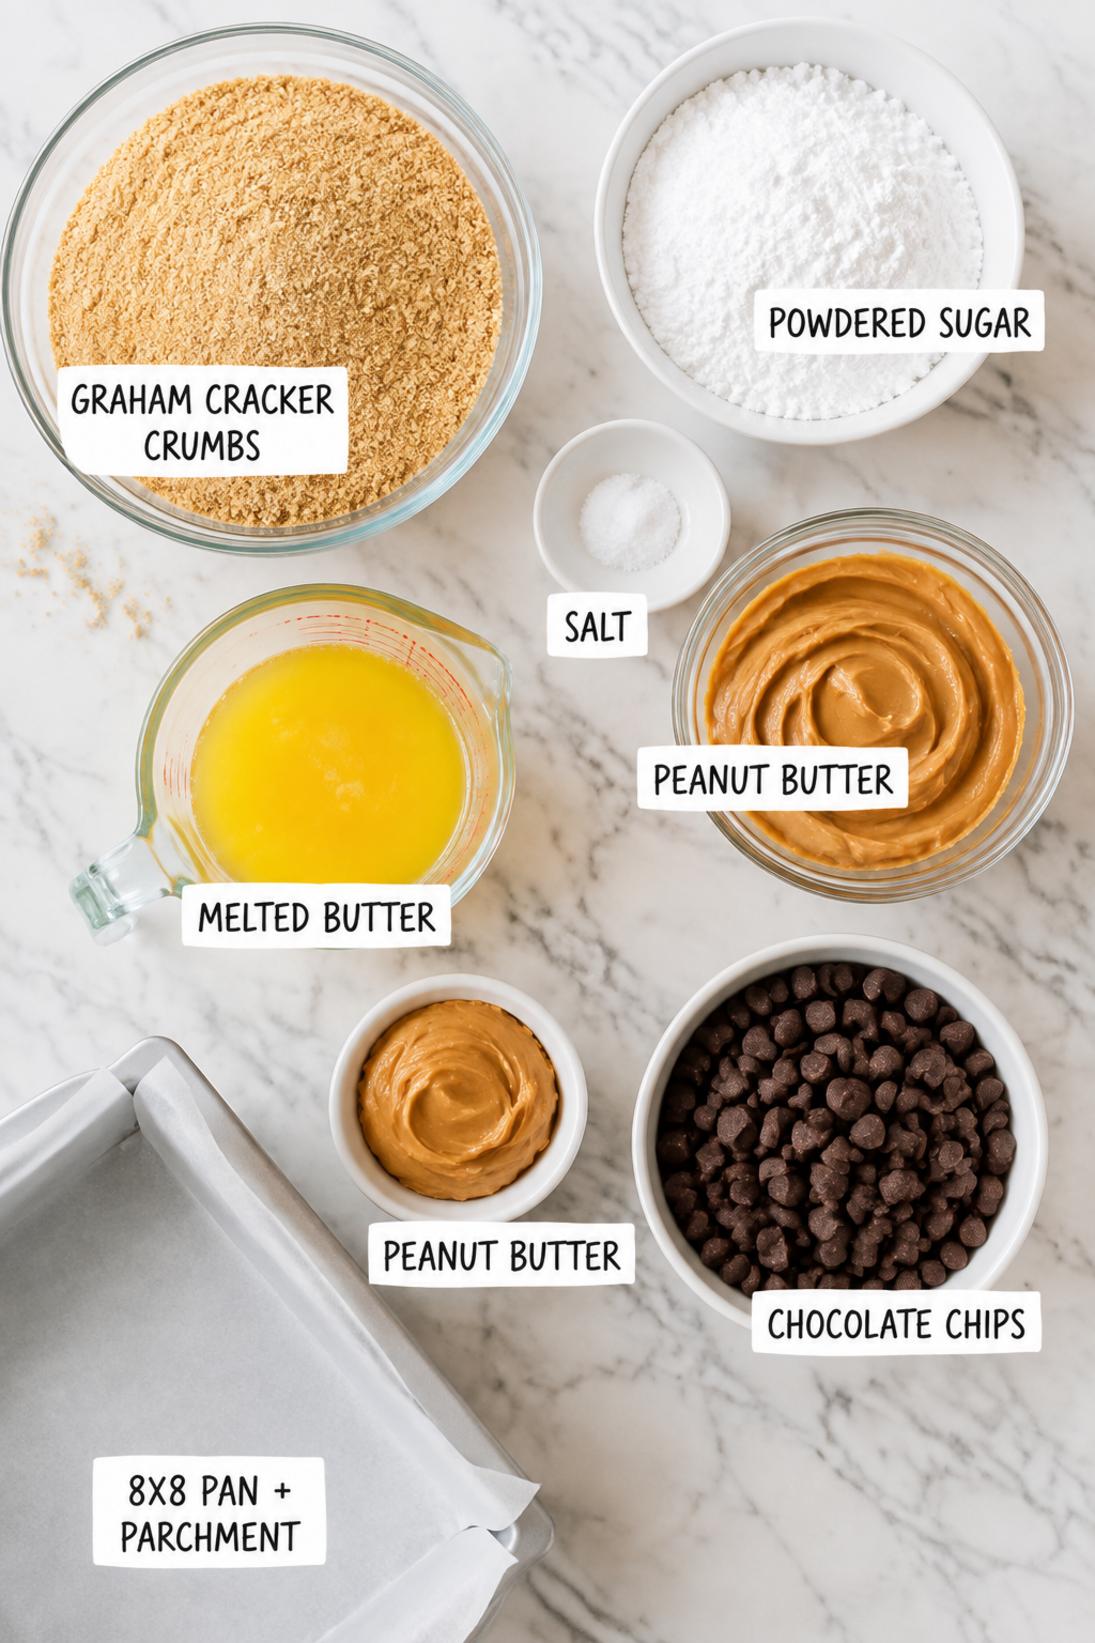
- Graham cracker crumbs: I use the fine crumbs from boxed graham crackers, but pulsing whole crackers works too. Finer crumbs help the crust press in evenly.
- Powdered sugar: This is what gives that classic sweet, smooth “no-bake bar” texture. Granulated sugar won’t blend in the same way here.
- Creamy peanut butter: Regular creamy peanut butter is my go-to because it’s thick and predictable. Natural peanut butter can work, but it needs to be well stirred and not runny.
- Unsalted butter: Melted butter helps everything bind and makes the crust sliceable once chilled. If you only have salted butter, just go lighter on the added salt.
- Fine salt: Don’t skip it. It keeps the crust from tasting flat and helps the peanut butter flavor pop.
Chocolate topping
- Semi sweet chocolate chips: Semisweet is my favorite here because it doesn’t get overly sweet with the crust. Milk chocolate is fine if that’s what you like, but it will be softer.
- Creamy peanut butter: A little peanut butter in the topping makes it smoother and easier to slice. It also gives a subtle peanut butter finish that I really like.
Recipe Instructions
- Prepare pan: Line an 8×8 inch pan with parchment paper, leaving some overhang on the sides so you can lift the bars out later. Set aside.
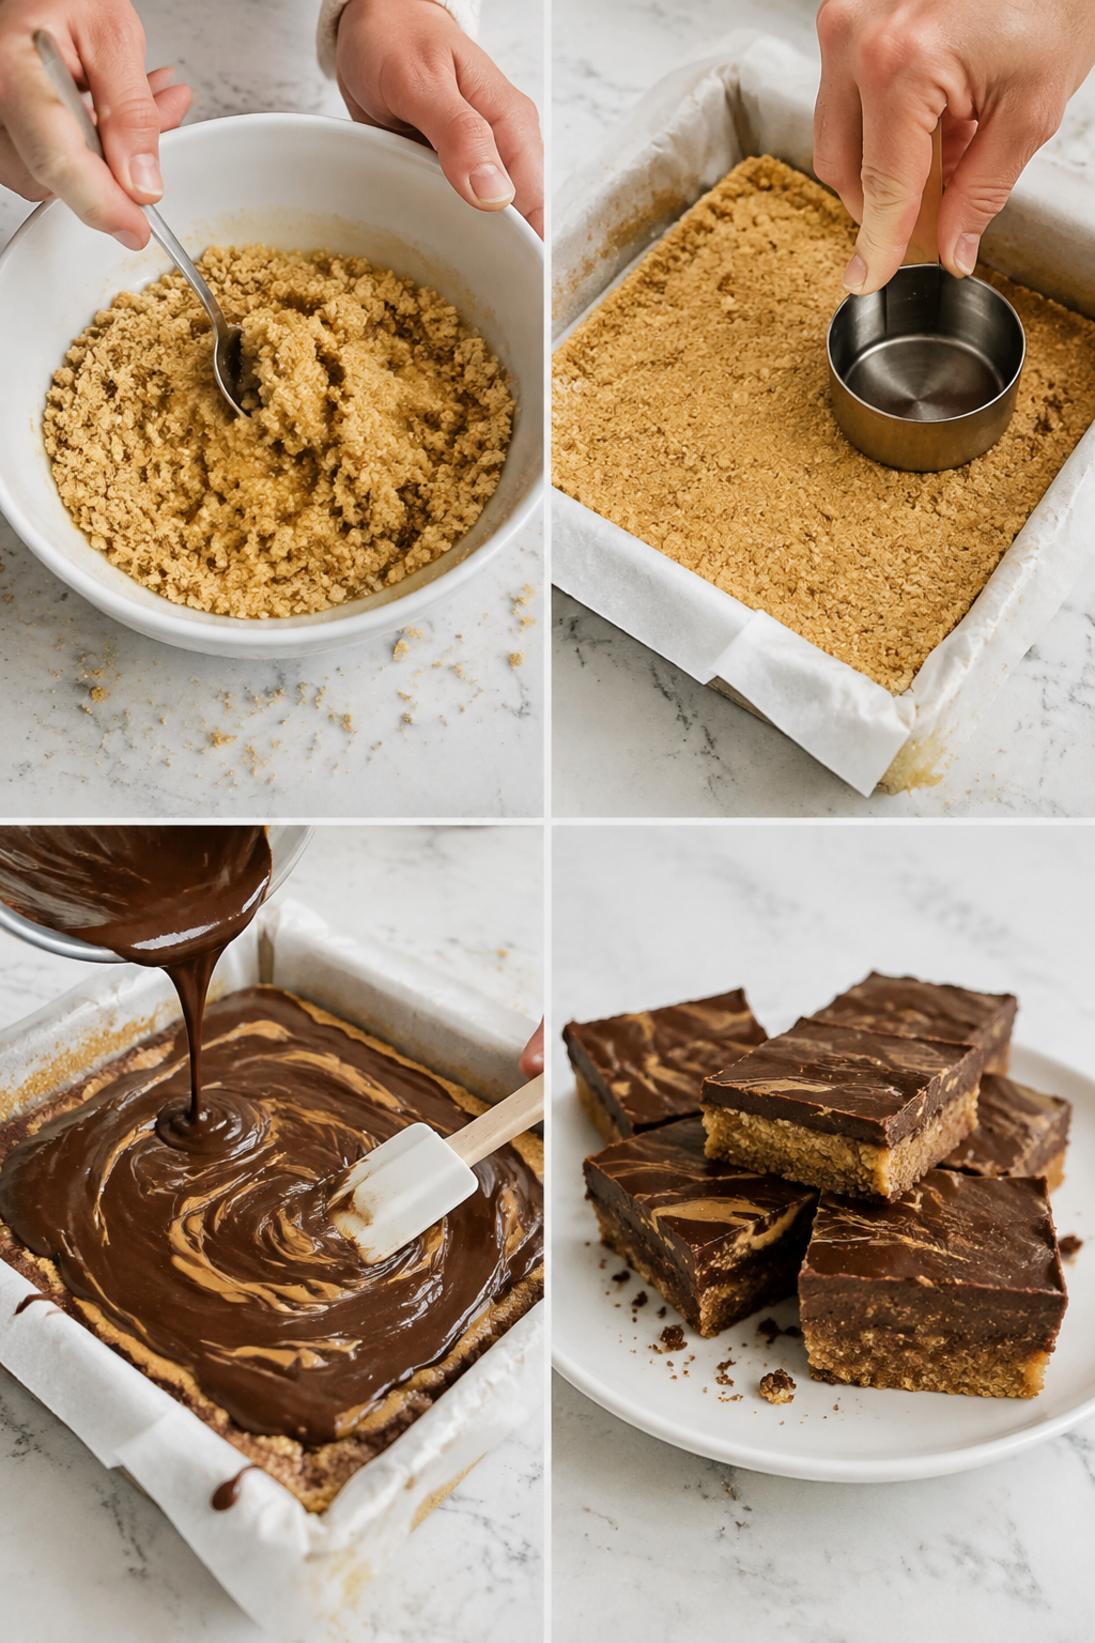
- Make crust: In a medium bowl, stir the graham cracker crumbs, powdered sugar, and salt together. Add the peanut butter and melted butter, then mix until thick and evenly combined.
- Press crust: Press the mixture firmly into the prepared pan in an even layer. Chill for 10 minutes to help it set up.
- Melt topping: Melt the chocolate chips and peanut butter together in the microwave in short bursts, stirring in between, until smooth. You can also melt it gently over a double boiler if you prefer.
- Add topping and chill: Spread the melted chocolate mixture evenly over the chilled crust. Refrigerate for 1 to 2 hours, until firm, then lift out and slice into bars with a warm, dry knife.
Some of my tips!
This is the part that really makes a difference. If you only read one section, make it this one because this is where I share the little trick that helps the recipe turn out so well.
Recipe Tips & Tricks
Use parchment paper with overhang. It makes lifting the whole slab out simple, and you’ll get cleaner sides than trying to dig bars out of the pan.
Press the crust down firmly. I use the bottom of a measuring cup to really pack it in. If it’s loosely packed, the bars can crumble when you slice.
Don’t rush the chill time. These slice best when the crust and topping are both fully firm. If they seem soft, give them a little more time in the fridge.
Warm your knife for clean cuts. Run the blade under hot water, wipe it dry, and slice. Repeat as needed, especially if the chocolate layer is thick.
Watch natural peanut butter. If it’s runny, the crust can end up greasy and soft. If you want to use it, stir it really well and make sure it’s thick.
Make some touches!
There are plenty of easy ways to serve this depending on the occasion. Keep it simple, or add a few small touches to make it feel a little more special.
Serving Suggestions
- Milk: A cold glass of milk is simple and classic with these. I like it especially if the bars are very chilled.
- Coffee or espresso: These are really good with coffee, especially something not too sweet like drip coffee or an americano.
- Fruit: Fresh strawberries or raspberries are nice on the side. It’s an easy way to add something fresh to the plate.
- Extra crunch: Sprinkle a little flaky salt or crushed pretzels on top right after spreading the chocolate. It gives a nice contrast once it sets.
Save it for later
This section covers how to store leftovers and what parts of the recipe you can prepare ahead of time.
Storage and Make Ahead
Store the bars airtight in the refrigerator. They hold their shape best when kept cold, and the chocolate layer stays nice and firm.
You can also make this recipe ahead and leave it in the pan until you’re ready to slice. I usually slice right before serving if I’m taking them somewhere.
If you want them to last longer, freeze the bars in an airtight container. Thaw in the fridge overnight so the topping doesn’t get sticky or sweaty.
A few quick answers
This section covers a few extra details that may help before you head to the recipe card.
Recipe FAQs
Can I use natural peanut butter?
You can, but it depends on the brand and how runny it is. If it’s well stirred and thick, it usually works fine.
If it’s very oily and loose, the crust can end up soft and a little greasy, and the bars won’t slice as cleanly.
Can I make these nut-free?
Yes. Sunflower seed butter is the easiest swap for peanut butter in both the crust and the topping.
Just know it can have a slightly different flavor, and some brands are a little sweeter, so taste as you go if you’re picky about sweetness.
Why is my chocolate topping cracking when I slice?
This usually happens when the bars are very cold and the topping is firm. Let the bars sit at room temperature for a few minutes, then slice with a warm, dry knife.
Can I add mix-ins to the crust?
Yes, and I like doing it when I want more texture. Crushed pretzels or chopped nuts are both great mixed into the crust.
Do I have to use an 8×8-inch pan?
An 8×8-inch pan gives you thick, classic bars. A 9×9-inch pan works too, but the layers will be thinner and they may set a little faster.
You might also like
Before you go, take a look at a few other recipes below the recipe card. They use similar ingredients in a different way and are worth saving too.
MORE DINNER RECIPES TO TRY


No-Bake Chocolate Bars
INGREDIENTS
Peanut butter crust
- 1 1/2 cups graham cracker crumbs
- 1 cup powdered sugar
- 1 cup creamy peanut butter
- 1/2 cup unsalted butter melted
- 1/4 tsp fine salt.
Chocolate topping
- 1 1/2 cups semi sweet chocolate chips
- 2 tbsp creamy peanut butter.
INSTRUCTIONS
Prepare pan
- Line an 8x8 inch pan with parchment paper leaving overhang
- set aside.
Make crust
- In a medium bowl stir graham cracker crumbs
- powdered sugar
- and salt
- add peanut butter and melted butter and mix until evenly combined and thick
- press firmly into the prepared pan in an even layer and chill 10 minutes to set.
Add topping and chill
- Melt chocolate chips and peanut butter together in the microwave in short bursts stirring until smooth or melt gently over a double boiler
- spread evenly over the chilled crust
- refrigerate 1 to 2 hours until firm
- lift out and slice into bars with a warm dry knife.


