
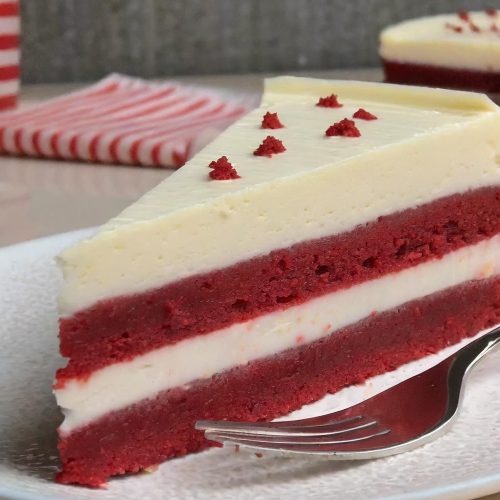
The combination of rich and velvety red velvet cake with creamy and smooth cheesecake is a match made in heaven. The vibrant red color of the cake is visually stunning, and the flavors are even more captivating.

From the moment you take your first bite, you are greeted with a luscious blend of chocolate and tangy cream cheese. The contrast in textures, with the moist cake and silky cheesecake layer, adds a delightful surprise. This dessert is truly a showstopper and is sure to impress anyone fortunate enough to indulge in it.
Ingredients Needed for This Recipe
For the cheesecake layer:
- 100g granulated sugar
- 30g corn flour
- 400g full fat cream cheese
- 2 teaspoons vanilla extract
- 150ml double cream, warm
- 80g white chocolate, melted
For the cake layers:
- 125g unsalted butter, softened
- 100ml any flavourless oil, I use vegetable oil
- 250g granulated sugar
- 2 teaspoons vanilla extract
- 4 eggs
- 140g buttermilk
- 230g plain flour
- 20g cocoa powder
- 1 teaspoon baking soda
- 2 teaspoons white vinegar
- Plus some red food colouring
For the cream cheese frosting:
- 300g unsalted butter, softened
- 300g icing sugar, sieved
- 1 tablespoon vanilla extract
- 600g full fat cream cheese
Instructions for Making Red Velvet Cheesecake
Making the cheesecake layer:
- To begin, make sure you heat your oven to 170c/325f. Additionally, prepare an 8 inch cake tin by coating it with grease and lining it.
- Combine the sugar, corn flour, cream cheese, and vanilla in a spacious bowl. Stir the ingredients well until they form a velvety blend.
- Add half of the warm double cream to the mixture and incorporate it using a whisk. Proceed to whisk in the remaining cream, followed by the melted white chocolate.
- Place the prepared batter into the cake tin and ensure it is evenly spread. Put this tin inside a larger tin or roasting tray. Pour boiling water into the larger tin until it reaches approximately halfway up the sides of the tin containing the cheesecake.
- Be cautious as you put this in your oven and cook for approximately 25-30 minutes. It will be finished when the edges of the cheesecake are firm, but the middle is slightly wobbly.
- After baking, allow it to cool at room temperature. Then transfer it to the refrigerator and let it solidify overnight.
Making the cake layers:
- You have the option of either making the cake layers on the same day as the cheesecake layer or making them the following day. Personally, I prefer making them on the same day as the cheesecake.
- Before you begin, make sure to preheat your oven to 180c/350f. Additionally, it is important to grease and line two cake tins measuring 8 inches each.
- Combine the butter, oil, sugar, and vanilla in a significant bowl. Mix them vigorously for a duration of 5 minutes.
- Include two of the eggs by blending them, then blend in the other two eggs. Proceed to incorporate the buttermilk and food coloring.
- Combine the flour and cocoa powder and stir until a uniform batter is achieved.
- Take a separate small bowl and put the baking soda in it. After that, pour the vinegar on top of it. At this point, the mixture will begin to bubble. Stir it quickly and immediately pour it into your cake batter. Continue mixing until everything is well combined.
- Place the batter into the cake tins and proceed to bake for approximately 35-40 minutes, or until a toothpick inserted in the middle comes out free of any residue.
- Once baked, leave to cool completely.
Making the cream cheese frosting:
- Take a big bowl and put in the softened butter, then beat it for a minute. Next, add half of the icing sugar and mix it, followed by adding the remaining icing sugar along with the vanilla. After all the icing sugar is well combined, beat it for 5 minutes.
- Put the cream cheese in and mix it until you achieve a creamy frosting consistency.
Putting the cake together:
- You do not need to cut the tops of your cake layers off to make them flatter, but I choose to do so.
- Place one of the cake layers onto a board, cover it with a layer of frosting, and then place the cheesecake layer on top. Spread another layer of frosting on top of the cheesecake layer, and finally, add the last layer of cake.
- You now have the freedom to decorate the cake to your liking. I simply covered it with icing, created a swirl on the top, and utilized the excess cake by crumbling it and applying it to the sides.
- Now cut into it and enjoy!
Tips for Perfecting the Recipe
Ingredient Temperature: For the cheesecake, ensure your ingredients are at the right temperature. Room temperature cream cheese blends more smoothly, avoiding lumps in your batter. However, for this particular recipe, the cream cheese doesn’t necessarily need to be at room temperature due to the inclusion of warm double cream, which helps to integrate the melted white chocolate seamlessly into the cold batter.
Baking the Cheesecake: The cheesecake layer is crucial. Baking it in a water bath helps maintain an even temperature, preventing cracks and ensuring a smooth, creamy texture. If using a springform pan, wrap the bottom securely in foil to prevent water from seeping in.
Coloring the Cake: Achieving the iconic red velvet color can be tricky. Use a high-quality red food coloring for a vibrant hue. The amount may vary depending on the brand, so add gradually until you reach the desired color.
Mixing the Batter: Overmixing the batter can lead to a dense cake. Mix just until the ingredients are combined and no flour streaks remain. This ensures a light, fluffy texture.
Testing for Doneness: Use a toothpick or cake tester to check if the cake layers are done. Insert it into the center of the cake; it should come out clean or with a few moist crumbs attached.
Storage Tips
Refrigerating the Cake: Due to the cheesecake layer and cream cheese frosting, it’s best to store this cake in the refrigerator. Cover it with a cake dome or loosely with plastic wrap to prevent it from absorbing any fridge odors.
Freezing the Cake: Both the cheesecake layer and the red velvet cake layers can be frozen separately before assembly. Wrap them tightly in plastic wrap and then in foil. When ready to use, thaw in the refrigerator overnight before assembling and frosting the cake.
Keeping the Cake Fresh: If you’ve cut into the cake but won’t finish it immediately, press a piece of plastic wrap directly onto the cut sides. This helps prevent the cake from drying out in the fridge.
Serving Suggestions
Room Temperature: Allow the cake to sit at room temperature for about 20 minutes before serving. This slight warming enhances the flavors and textures, making the cake layers more tender and the cheesecake layer creamier.
Garnishes: Elevate your presentation with simple garnishes. Fresh berries, mint leaves, or a dusting of powdered sugar can add a touch of elegance without overwhelming the cake’s flavors.
Pairings: Serve with a cup of coffee or a glass of milk to complement the rich flavors of the cake. For a more adult beverage, a sweet dessert wine or a light-bodied coffee porter can pair beautifully.
FAQs about Red Velvet Cheesecake
Can I use a different kind of cake for this recipe?
Absolutely! This recipe is easily customizable to suit your preferences. You can experiment with different cake flavors like chocolate or vanilla and still use the cheesecake layer.
How long does it take to prepare and assemble this cake?
The total time for this recipe is about 4 hours and 30 minutes, with 1 hour for prep, 1 hour and 10 minutes for baking, and another 2 hours and 20 minutes for cooling and freezing. Assembling the cake takes about 30 minutes.
Can I make the cake layers and cheesecake layer in advance?
Yes! You can bake the cake layers and cheesecake layer ahead of time and freeze them for easy handling. Just make sure to wrap them securely with plastic wrap before freezing.
What can I use instead of red food coloring?
If you prefer not to use artificial food coloring, you can try natural alternatives like beet juice or raspberry puree to achieve a reddish color. Be aware that this might affect the flavor of the cake, so adjust accordingly.
Can I use a different frosting instead of cream cheese frosting?
Sure, you can use any frosting you like! Some popular alternatives include chocolate ganache or whipped cream. However, keep in mind that cream cheese frosting pairs well with the tangy and sweet flavors of the cheesecake and red velvet cake.
How should I store any leftover cake?
To store any leftover cake, place it in an airtight container in the refrigerator. It stays fresh for up to five days. You can also freeze any leftover slices for up to three months. When ready to eat, let the cake thaw in the refrigerator overnight and serve it chilled. Avoid leaving the cake at room temperature for too long, as the cream cheese frosting can melt and become runny.
Red Velvet Cheesecake
INGREDIENTS
For the cheesecake layer:
- 100 g granulated sugar
- 30 g corn flour
- 400 g full fat cream cheese
- 2 teaspoons vanilla extract
- 150 ml double cream warm
- 80 g white chocolate melted
For the cake layers:
- 125 g unsalted butter softened
- 100 ml any flavourless oil I use vegetable oil
- 250 g granulated sugar
- 2 teaspoons vanilla extract
- 4 eggs
- 140 g buttermilk
- 230 g plain flour
- 20 g cocoa powder
- 1 teaspoon baking soda
- 2 teaspoons white vinegar
- Plus some red food colouring
For the cream cheese frosting:
- 300 g unsalted butter softened
- 300 g icing sugar sieved
- 1 tablespoon vanilla extract
- 600 g full fat cream cheese
INSTRUCTIONS
Making the cheesecake layer:
- To begin, make sure you heat your oven to 170c/325f. Additionally, prepare an 8 inch cake tin by coating it with grease and lining it.
- Combine the sugar, corn flour, cream cheese, and vanilla in a spacious bowl. Stir the ingredients well until they form a velvety blend.
- Add half of the warm double cream to the mixture and incorporate it using a whisk. Proceed to whisk in the remaining cream, followed by the melted white chocolate.
- Place the prepared batter into the cake tin and ensure it is evenly spread. Put this tin inside a larger tin or roasting tray. Pour boiling water into the larger tin until it reaches approximately halfway up the sides of the tin containing the cheesecake.
- Be cautious as you put this in your oven and cook for approximately 25-30 minutes. It will be finished when the edges of the cheesecake are firm, but the middle is slightly wobbly.
- After baking, allow it to cool at room temperature. Then transfer it to the refrigerator and let it solidify overnight.
Making the cake layers:
- You have the option of either making the cake layers on the same day as the cheesecake layer or making them the following day. Personally, I prefer making them on the same day as the cheesecake.
- Before you begin, make sure to preheat your oven to 180c/350f. Additionally, it is important to grease and line two cake tins measuring 8 inches each.
- Combine the butter, oil, sugar, and vanilla in a significant bowl. Mix them vigorously for a duration of 5 minutes.
- Include two of the eggs by blending them, then blend in the other two eggs. Proceed to incorporate the buttermilk and food coloring.
- Combine the flour and cocoa powder and stir until a uniform batter is achieved.
- Take a separate small bowl and put the baking soda in it. After that, pour the vinegar on top of it. At this point, the mixture will begin to bubble. Stir it quickly and immediately pour it into your cake batter. Continue mixing until everything is well combined.
- Place the batter into the cake tins and proceed to bake for approximately 35-40 minutes, or until a toothpick inserted in the middle comes out free of any residue.
- Once baked, leave to cool completely.
Making the cream cheese frosting:
- Take a big bowl and put in the softened butter, then beat it for a minute. Next, add half of the icing sugar and mix it, followed by adding the remaining icing sugar along with the vanilla. After all the icing sugar is well combined, beat it for 5 minutes.
- Put the cream cheese in and mix it until you achieve a creamy frosting consistency.
Putting the cake together:
- You do not need to cut the tops of your cake layers off to make them flatter, but I choose to do so.
- Place one of the cake layers onto a board, cover it with a layer of frosting, and then place the cheesecake layer on top. Spread another layer of frosting on top of the cheesecake layer, and finally, add the last layer of cake.
- You now have the freedom to decorate the cake to your liking. I simply covered it with icing, created a swirl on the top, and utilized the excess cake by crumbling it and applying it to the sides.
- Now cut into it and enjoy!


