

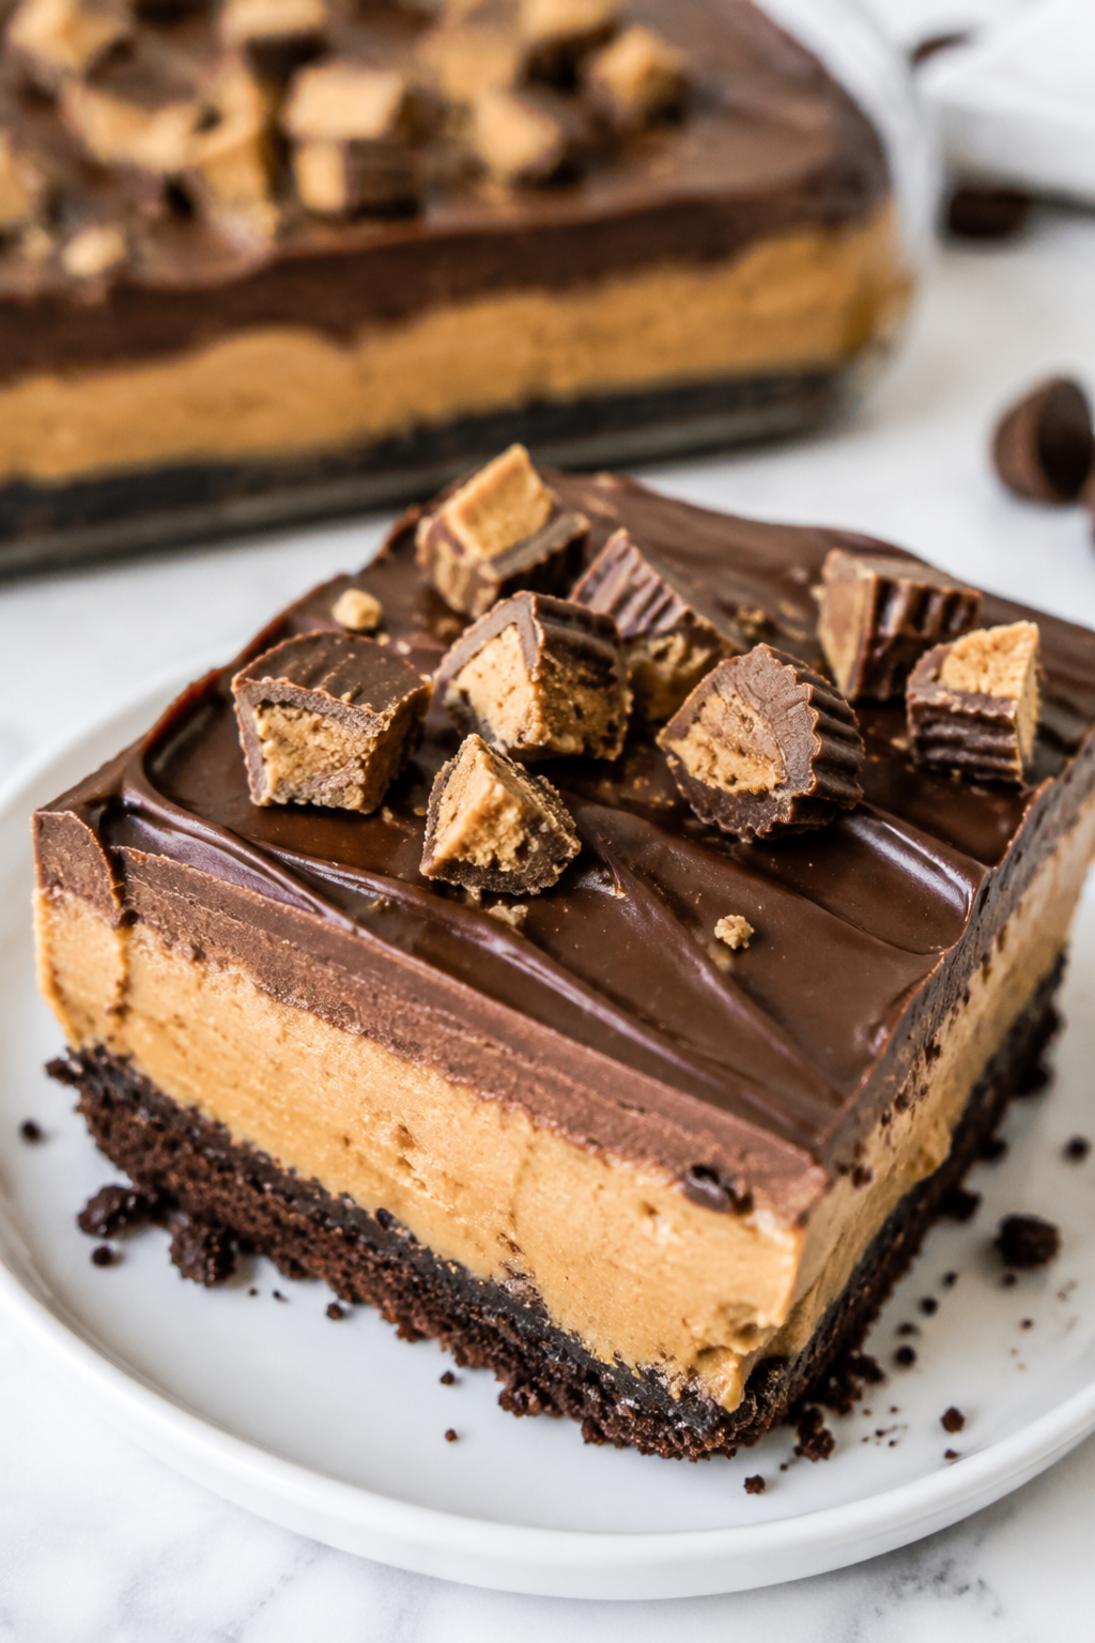
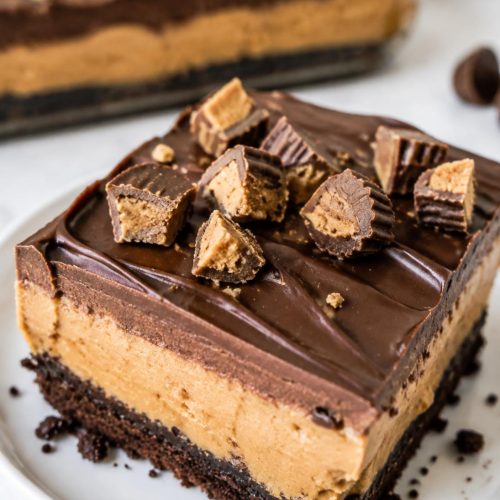
This Chocolate Peanut Butter Cup Dessert is a no-bake, layered bar situation with a cookie crust, a creamy peanut butter filling, and a thick chocolate pudding top. It’s rich, cold, and sliceable, and it hits that classic chocolate-and-peanut-butter combo in a really satisfying way.
For me, the best part is the middle layer. The peanut butter filling is smooth and fluffy from the whipped topping, but it still has that little bit of tang from the cream cheese that keeps it from tasting flat. Then the pudding goes on like a soft blanket and sets up nicely in the fridge.
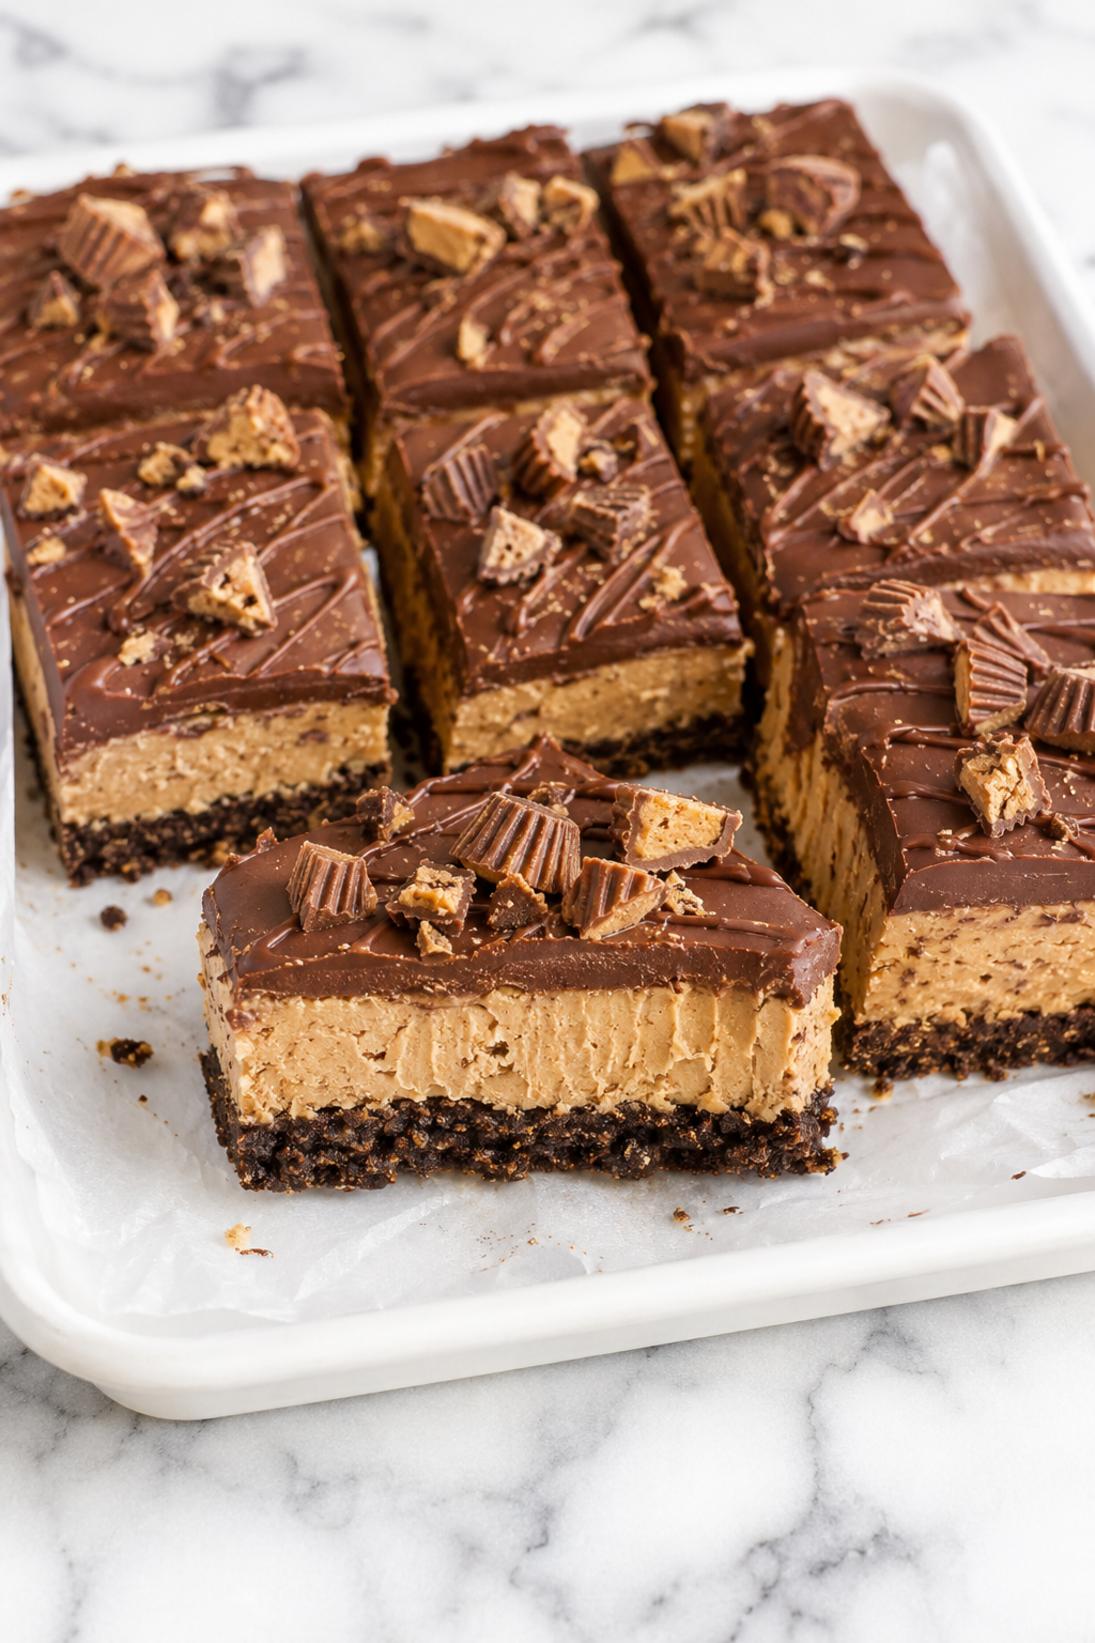
I like serving this as a make-ahead dessert for weekends, potlucks, and holiday trays because it cuts into clean bars once it’s fully chilled. It’s also nice when you want something chocolatey that’s not baked and doesn’t require a mixer marathon.
Why You’ll Love This Recipe
No-bake win: No oven, no water baths, no fuss. It’s the kind of dessert I make when the kitchen is warm or I’m short on time.
That peanut butter layer: It’s creamy, fluffy, and tastes like a peanut butter cup filling. It’s thick enough to hold up under the pudding, which is exactly what you want here.
Easy to slice: Once it’s chilled, you get neat bars with clean layers. It looks a little fancy on a platter, even though it’s very straightforward.
Make-ahead friendly: This is better after a long chill, so it works great when you want dessert handled early. Overnight is ideal if you can swing it.
Fun toppings: Chopped mini peanut butter cups are my go-to, but the drizzle and mini chips make it easy to tweak depending on who you’re serving.
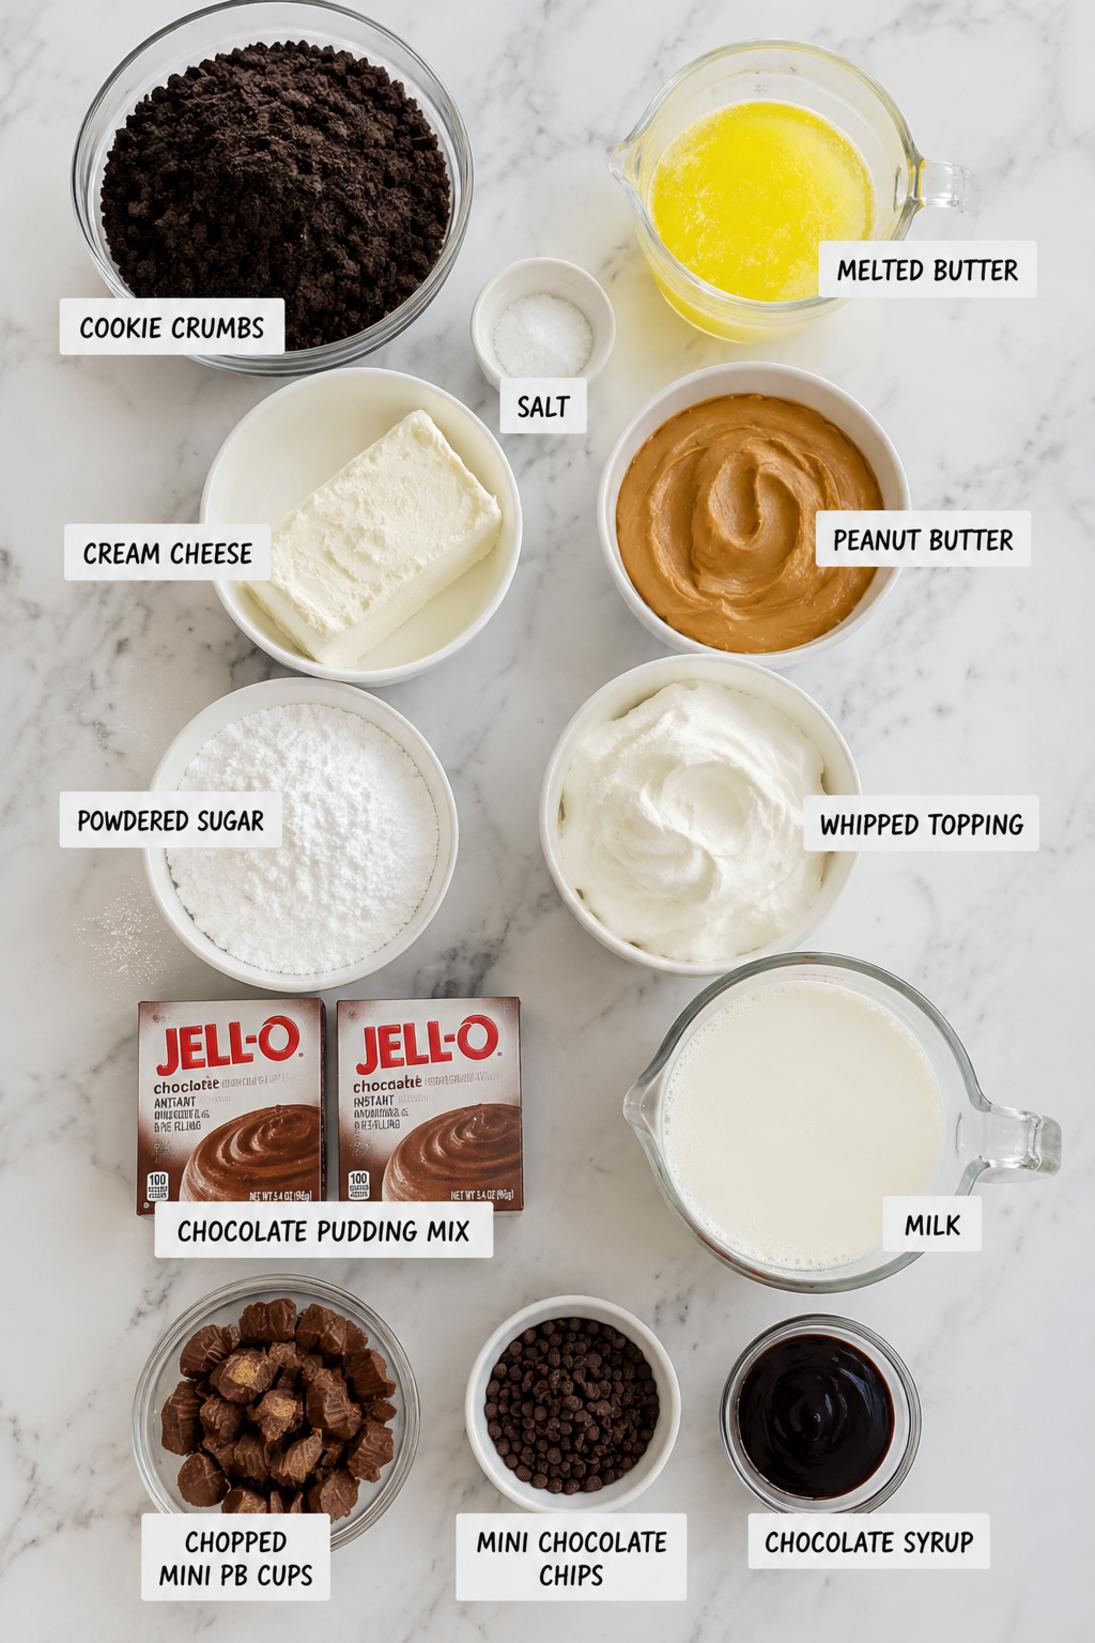
Ingredients You’ll Need
Crust
- Chocolate sandwich cookies: I use regular Oreo-style cookies here. A food processor makes quick work of the crumbs and gives you a tighter crust.
- Unsalted butter: Melted butter is what turns the crumbs into a press-in crust that actually slices cleanly later.
- Salt: Don’t skip the pinch. It keeps the crust from tasting one-note and makes the chocolate pop more.
Peanut Butter Layer
- Cream cheese: Softened is important so you don’t end up with little lumps. Full-fat gives the best texture here.
- Creamy peanut butter: The regular shelf-stable kind works best (like Jif or Skippy). Natural peanut butter can separate and make the layer a bit oily.
- Powdered sugar: This sweetens and thickens the filling. I adjust depending on how sweet I want it that day.
- Whipped topping: Thawed whipped topping keeps the layer light and easy to spread. Homemade whipped cream can work, but it’s a little softer and doesn’t hold quite as long.
Chocolate Pudding Layer
- Instant chocolate pudding mix: Make sure it’s instant, not cook-and-serve. This sets up fast and gives you that classic pudding layer.
- Milk: Cold milk helps the pudding thicken quickly. I usually use whole or 2% for a thicker feel.
Topping
- Mini peanut butter cups: Chop them small so you get a little in every bite and they’re easier to cut through.
- Chocolate syrup: Totally optional, but a small drizzle looks nice and adds a bit more chocolate on top.
- Mini chocolate chips: Optional too. I like them if I’m skipping the syrup or want a little extra texture.
Recipe Instructions
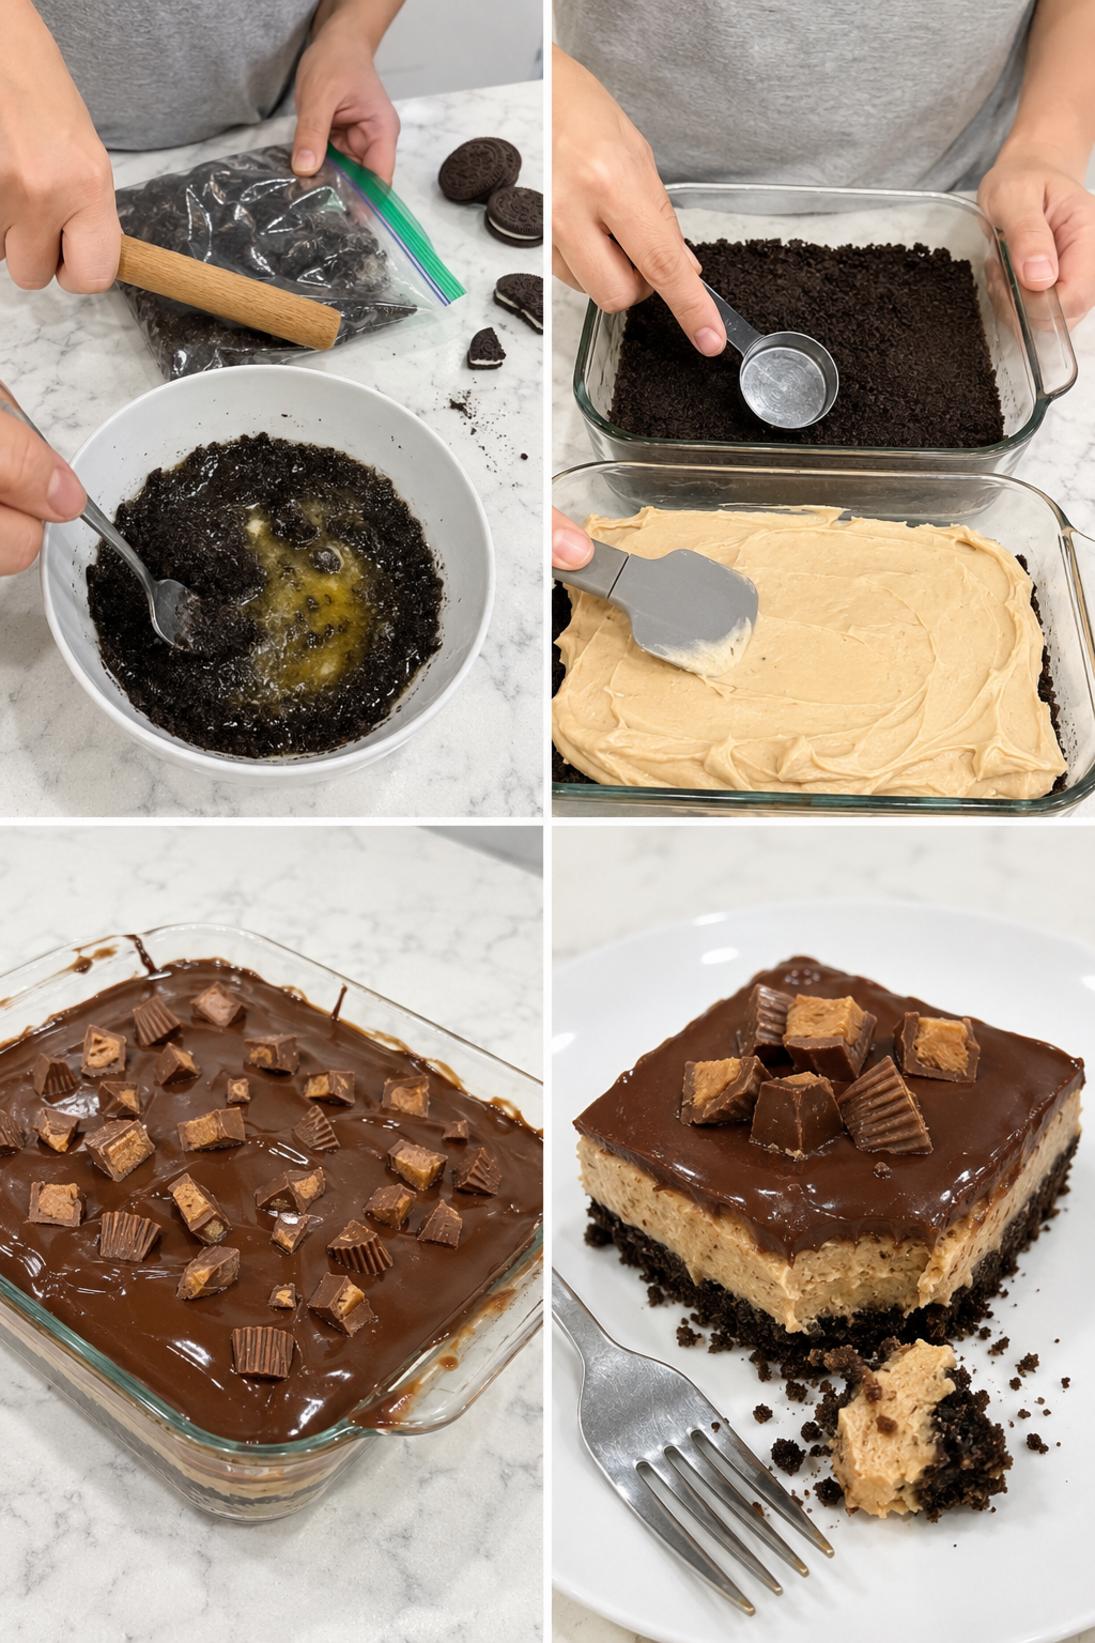
- Make the crust: Mix the cookie crumbs with melted butter and a pinch of salt until the crumbs are evenly moistened.
- Press the crust: Press the mixture firmly into a 9×13 inch dish. Chill for 10 minutes so it can set up a bit.
- Beat the cream cheese: Beat the softened cream cheese until smooth and creamy.
- Add peanut butter and sugar: Beat in the peanut butter, then the powdered sugar, until the mixture is thick and well combined.
- Fold in whipped topping: Fold in the thawed whipped topping until you don’t see streaks, then spread the peanut butter layer evenly over the chilled crust.
- Mix the pudding: Whisk the instant chocolate pudding mix with cold milk for 2 minutes, until it thickens. Let it stand for 5 minutes to set slightly.
- Add the pudding layer: Spread the pudding evenly over the peanut butter layer, smoothing the top.
- Top and chill: Sprinkle chopped mini peanut butter cups on top and add an optional drizzle of chocolate syrup or mini chocolate chips. Cover and refrigerate at least 4 hours or overnight, then cut into bars and serve chilled.
Some of my tips!
This is the part that really makes a difference. If you only read one section, make it this one because this is where I share the little trick that helps the recipe turn out so well.
Recipe Tips & Tricks
Use a food processor for the crumbs. Fine crumbs pack down better and hold together when you cut the bars. If you crush by hand, just take a little extra time to get them as even as you can.
Press the crust really firmly. I use the bottom of a flat measuring cup or a drinking glass. The tighter the crust is packed, the cleaner your slices will be.
Soften the cream cheese fully. If it’s still cool in the middle, you’ll fight lumps in the peanut butter layer. I like letting it sit out until it’s easy to press with a finger.
Let the pudding stand before spreading. Giving it a few minutes to thicken makes it easier to spread without pulling up the peanut butter layer underneath.
Chop the peanut butter cups small. Big chunks look nice, but they can make the bars harder to cut. Smaller pieces give you a more even topping and neater cuts.
Make some touches!
There are plenty of easy ways to serve this depending on the occasion. Keep it simple, or add a few small touches to make it feel a little more special.
Serving Suggestions
- Milk: A cold glass of milk is classic with this. It’s especially nice if you go heavier on the peanut butter cups on top.
- Coffee: I like this with hot coffee or an iced latte. The bitterness helps a lot with a rich dessert like this.
- Fruit: Strawberries or raspberries on the side are simple and good. They make the plate feel a little less heavy.
- Extra whipped topping: A small dollop on each bar is easy and looks nice. If you have leftover whipped topping, this is a good place to use it.
Save it for later
This section covers how to store leftovers and what parts of the recipe you can prepare ahead of time.
Storage and Make Ahead
Store leftovers covered in the fridge. This dessert is meant to be served cold, and it holds its layers best when it stays chilled.
You can make this recipe ahead the day before you need it. In fact, I prefer it after an overnight chill because the crust firms up and the slices come out cleaner.
If you want them to last longer, you can freeze individual portions in an airtight container. Thaw in the fridge overnight so the layers don’t get watery.
A few quick answers
This section covers a few extra details that may help before you head to the recipe card.
Recipe FAQs
Can I use graham cracker crumbs instead of chocolate sandwich cookies?
Yes. Regular graham cracker crumbs work, and chocolate graham crumbs are even closer to the original flavor. Just keep the crust mixture packed tightly so it holds together.
How long does it need to chill before slicing?
I’d give it at least 4 hours, and overnight is even better. The longer chill makes the layers firmer and the crust easier to cut without crumbling.
Can I make the peanut butter layer less sweet?
You can. I like using less powdered sugar if I’m topping it heavily with peanut butter cups and syrup. Start with a smaller amount, taste, and adjust from there.
Can I add more peanut butter flavor to the chocolate layer?
Yes, and it’s a good idea if you want the peanut butter to come through more. Stir a couple tablespoons of peanut butter into the pudding after it thickens, then spread it on.
Does homemade whipped cream work instead of whipped topping?
It can, but the peanut butter layer will be a little softer and doesn’t hold as long. If you go that route, use stabilized whipped cream if you can, and plan to serve it within a day or two.
You might also like
Before you go, take a look at a few other recipes below the recipe card. They use similar ingredients in a different way and are worth saving too.
MORE DINNER RECIPES TO TRY


Chocolate Peanut Butter Cup Dessert
INGREDIENTS
Crust
- 24 chocolate sandwich cookies crushed
- 6 tbsp unsalted butter melted
- pinch salt.
Peanut Butter Layer
- 8 oz cream cheese softened
- 1 cup creamy peanut butter
- 1 cup powdered sugar
- 8 oz whipped topping thawed.
Chocolate Pudding Layer
- 2 boxes instant chocolate pudding mix 3.4 oz each
- 3 cups cold milk.
Topping
- 1 cup mini peanut butter cups chopped
- 2 tbsp chocolate syrup optional
- 2 tbsp mini chocolate chips optional.
INSTRUCTIONS
Crust
- mix cookie crumbs with melted butter and salt until evenly moistened
- press firmly into a 9x13 inch dish
- chill 10 minutes to set.
Peanut Butter Layer
- beat cream cheese until smooth
- beat in peanut butter then powdered sugar until thick and creamy
- fold in whipped topping until fully combined
- spread evenly over chilled crust.
Chocolate Pudding Layer
- whisk pudding mix with cold milk for 2 minutes until thickened
- let stand 5 minutes to set slightly
- spread pudding evenly over peanut butter layer.
Finish And Chill
- top with chopped mini peanut butter cups and optional drizzle or chips
- cover and refrigerate at least 4 hours or overnight for clean slices
- cut into bars and serve chilled.


